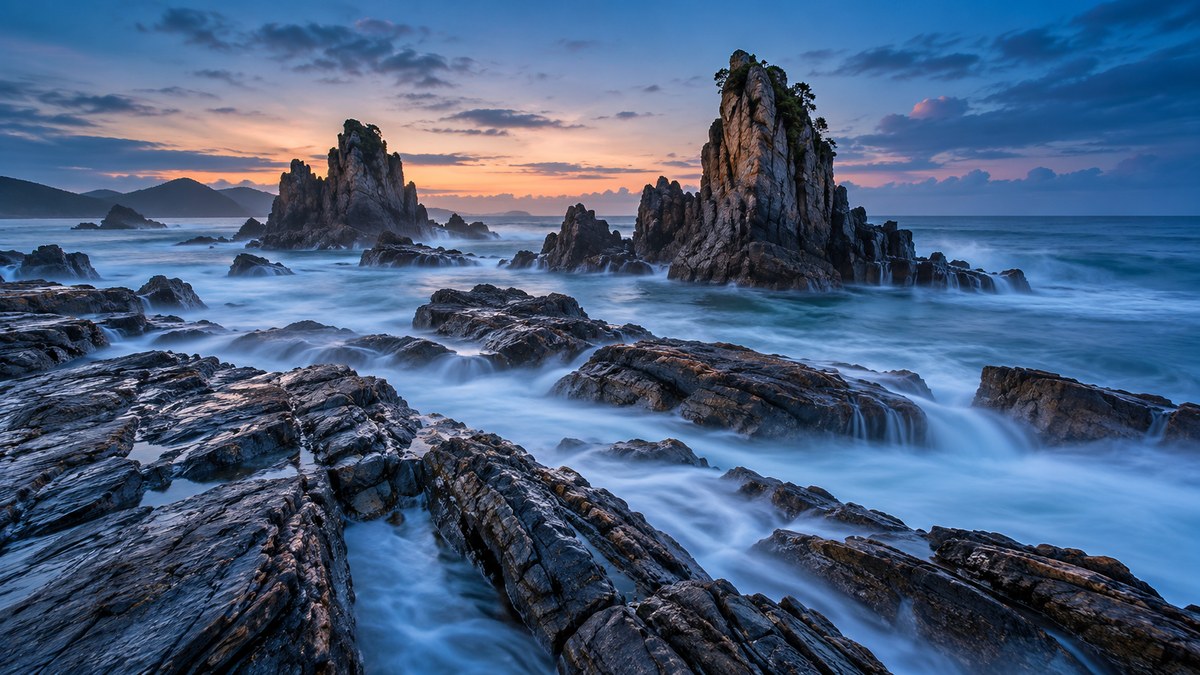
You are standing on a beach in Thailand, watching waves crash against a limestone karst. The light is fading. The wind is picking up. You know that a long exposure could turn the chaos of the ocean into a silky, ethereal mist. But every time you try, the rocks come out soft, the water looks muddy, or the sky blows out to pure white. You are not alone. Getting a sharp, dramatic long exposure of Asia’s coastal rock formations takes more than just a tripod and a slow shutter speed. It takes a repeatable process.
Mastering long exposure seascape photography in Asia means combining rock-solid stability, precise neutral density filters, and careful exposure blending. Focus on sharp focus at f/8 or f/11, use a 6-stop or 10-stop ND filter for motion blur, and always shoot in raw to recover highlights. Scout your composition at low tide for the best foreground rocks.
The Gear You Actually Need for Coastal Long Exposures
You do not need the most expensive camera on the market. But you do need a few non-negotiable pieces of gear. Let us break them down.
- A sturdy tripod. Carbon fiber is nice for weight, but a metal tripod with a hook on the center column to hang your bag for extra weight is better. Wind near the coast is relentless.
- A remote shutter release. Even pressing the shutter button by hand can introduce shake. Use a cable release, an intervalometer, or a two-second self-timer.
- Neutral density filters. A 6-stop (ND64) filter is great for turning daytime waves into soft streaks. A 10-stop (ND1000) filter transforms midday light into a 30-second exposure. For a deeper guide on what to pack, read our article on choosing the perfect camera gear for capturing Asia’s stunning landscapes.
- A lens cloth and a blower. Salt spray is your enemy. Wipe your filter between every few frames.
- Lens hood. It blocks stray light and protects the front element from rogue splashes.
Finding Your Composition Before the Light Fades
The biggest mistake photographers make is arriving at sunset and scrambling for a composition. You want to scout during the middle of the day or at low tide. Walk the shoreline. Look for rock formations that lead the eye into the frame. A single jagged rock in the foreground, with a strong leading line toward a distant island, works every time.
Check the tide tables for your location. In places like Railay Beach in Thailand or the rock arches of Vietnam’s Ha Long Bay, the difference between high and low tide can be several feet. At low tide, you can position yourself on exposed rock shelves that will be underwater an hour later. That is where the best foregrounds live.
The 5-Step Shooting Process for Sharp Results
Here is a numbered list of the process I use from setup to capture. Follow this order and you will avoid most common errors.
- Set up your tripod and compose without filters. Level your horizon. Lock down every leg and tighten all knobs. Take a test shot to confirm your framing.
- Focus manually and then lock it. Autofocus can hunt in low light or through a dark filter. Use live view, zoom in on a high-contrast edge of a rock, and focus manually. Switch your lens to manual focus mode so it does not change when you attach the filter.
- Attach your ND filter and switch to manual exposure mode. Your camera’s meter will likely read underexposed because of the filter. That is normal. Switch to full manual mode.
- Calculate your shutter speed. Start with a base exposure without the filter. Say your base reading is 1/60th of a second at f/8, ISO 100. Attach a 6-stop ND filter. That 1/60th of a second becomes roughly 1 second. For a 10-stop filter, it becomes 30 seconds. Use a calculator app on your phone to be precise.
- Use the self-timer and mirror lock-up. Set a 2-second delay on the shutter. If you have a DSLR, lock the mirror up before exposure to eliminate vibration.
Understanding Your Settings: A Simple Reference Table
Different conditions call for different combinations. Here is a table to help you decide on the spot.
| Condition | Aperture | ISO | Shutter Speed (with 10-stop ND) | Goal |
|---|---|---|---|---|
| Bright midday sun | f/11 | 100 | 30 to 60 seconds | Extreme motion blur, milky water |
| Golden hour, low light | f/8 | 100 | 2 to 8 seconds | Soft wave streaks, detail retained |
| Overcast, flat light | f/8 | 100 | 15 to 30 seconds | Moody, minimal texture in water |
| Storm light, dark sky | f/8 | 200 | 60+ seconds | Dramatic clouds, silky sea |
Keep your aperture between f/8 and f/11 for maximum sharpness. Avoid f/16 or smaller because diffraction will soften your rocks. ISO stays at 100 unless you need to keep shutter speed under 30 seconds for a specific look.
Handling Challenging Light Conditions
Asia’s coastal light can be brutal. Midday sun in the Philippines or Indonesia is harsh. The sky is bright, the shadows are deep, and your camera’s dynamic range struggles. You have two tools to fix this: exposure blending and graduated neutral density filters.
Exposure blending means taking two frames. One exposed for the sky, one for the foreground. You blend them later in post-processing. This is the most reliable method for high-contrast scenes.
Graduated ND filters are glass rectangles that are dark on top and clear on the bottom. You slide them into a holder to darken the sky in a single exposure. They work well when the horizon is straight, but they can cause problems if rocks poke above the horizon line.
For a deeper look at working with difficult light, check out our guide on mastering low light photography techniques in Asian landscapes.
Common Mistakes That Ruin Seascape Long Exposures
Let us address the mistakes that show up in beginner and intermediate work alike.
- Soft focus from filter stack. Stacking a polarizer and an ND filter can create a slight blur. Use a single filter when possible.
- Color cast from cheap ND filters. Inexpensive filters often add a magenta or blue tint. Fix it in post by adjusting the white balance, but better yet, buy a neutral brand like Lee, NiSi, or Formatt-Hitech.
- Camera shake from wind. A lightweight tripod will vibrate in a gust. Hang your camera bag from the center hook to add mass and dampen movement.
- Overexposed highlights. The sea and sky are brighter than you think. Use your histogram and expose to the right without clipping. If you are unsure, underexpose by one stop. You can recover shadows in raw, but blown highlights are gone forever.
“The difference between a good seascape and a great one is often just a few millimeters of tripod leg adjustment. Get low. Get stable. Then wait for the wave to hit the rock just right.” — professional seascape photographer based in Bali.
Refining Your Technique for Asia’s Unique Coastlines
Asia offers some of the most dramatic coastal rock formations on the planet. From the karst towers of Ha Long Bay to the volcanic sea stacks of Indonesia’s Komodo National Park, each location has its own challenges.
In places like Railay Beach, you often shoot directly into the sun during golden hour. That creates extreme contrast. Your best bet is to composite two exposures: one for the sky and one for the dark foreground rocks. Use a sturdy tripod and do not move the camera between frames.
In locations with heavy mist or haze, like the foggy mornings of Thailand’s southern islands, your long exposure will make the haze look even more atmospheric. That can be a good thing. Lean into it. Use a 10-stop filter to stretch the exposure to 60 seconds. The haze will smooth out and create a painterly effect.
If you are shooting in monsoon season, watch the forecast. Storm light can produce the most dramatic skies of the year, but rain and salt spray will test your gear. Bring a rain cover and dry your equipment thoroughly after each session. For more on this, read our guide on mastering monsoon moods: how to capture dramatic storm light over Asian landscapes in 2026.
How to Edit Your Raw Files for Maximum Drama
You shot in raw. Good. Now open the file in Lightroom or Capture One.
Start with the basics. Set the white balance to something natural. Daylight or cloudy usually works well for coastal scenes. Increase contrast slightly to make the rocks pop. Drop the highlights to recover detail in the sky. Lift the shadows just enough to see texture in the dark foreground rocks.
Use the clarity slider for mid-tone contrast. A small boost, maybe +10 to +15, will define the texture of the rocks without making the water look harsh. Add a graduated filter over the sky to darken it further and bring out cloud detail.
For color, consider a slight split tone. A cool blue in the shadows and a warm orange in the highlights mimics the classic golden hour look. Do not overdo it. Subtlety wins.
For a full walkthrough of post-processing, see our guide on mastering Asian landscape photography edits for stunning results.
Putting It All Together on Location
You have the gear. You know the settings. Now it is time to apply everything in the field.
Arrive at least 90 minutes before sunset. Walk the beach. Find a rock formation that has interesting texture and leads the eye into the frame. Set up your tripod and compose. Wait for a wave to crash against the foreground rock. Press the shutter. Check the histogram. Adjust. Repeat.
Do not pack up when the sun dips below the horizon. The best light often comes 10 to 20 minutes after sunset, when the sky turns deep purple and orange. That is when your long exposure will capture both the fading light and the movement of the sea in one frame.
If you are planning a trip to capture these landscapes, consider reading our guide on 6 essential techniques for capturing coastal landscapes in Vietnam for location-specific advice.
Your Next Step Toward Better Seascapes
The difference between a snapshot and a portfolio-worthy long exposure comes down to preparation. Scout your location. Lock your focus. Use a filter that matches the light. Keep your tripod stable. Blend exposures when the contrast is too high.
Now go out and shoot. Find a rocky coastline near you, or book a trip to one of Asia’s iconic karst beaches. Set up your tripod. Take your time. Wait for the wave. Press the shutter. Review the result. Adjust. Try again. That process, repeated over and over, is what builds the skill to capture the perfect long exposure shot of Asia’s coastal rock formations.