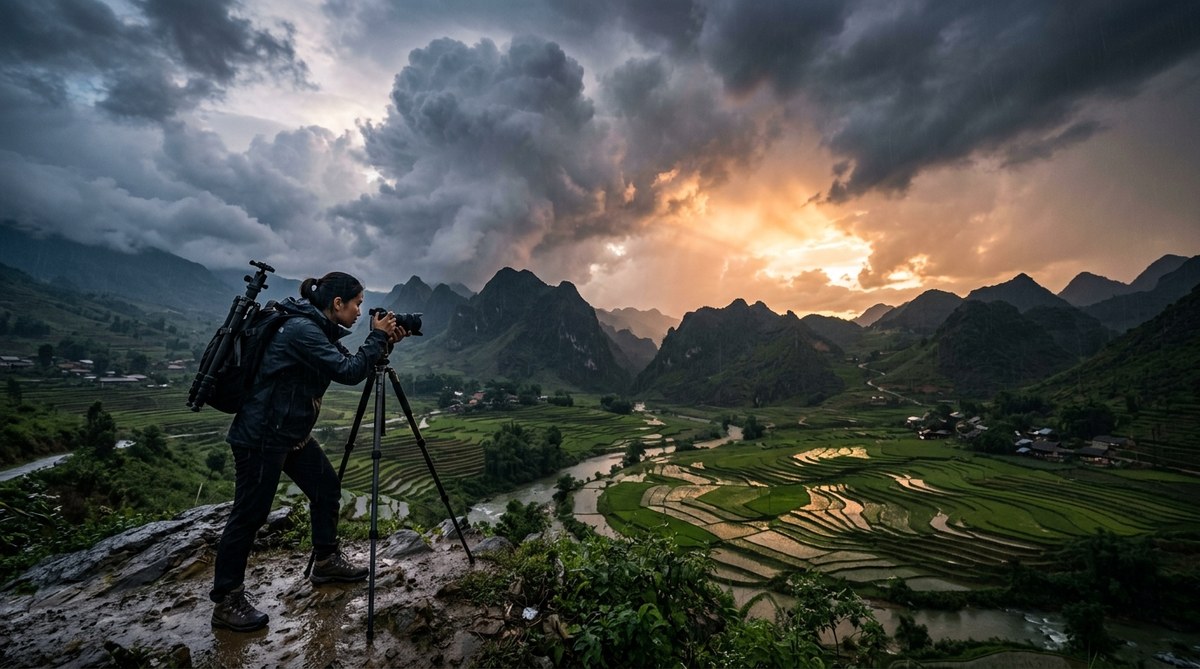
The first time you see a monsoon storm break over a rice terrace in Bali or a mountain pass in Sapa, you realize why so many landscape photographers book their flights around the rainy season. The air turns electric. The sky shifts from flat gray to deep violet and gold in minutes. Light rays cut through gaps in the clouds like spotlights. This is not the kind of light you get on a clear blue day. This is the kind of light that makes you forget about the rain soaking through your jacket.
Monsoon photography rewards patience and preparation. The best storm light arrives in narrow windows of ten to fifteen minutes. To capture it, you need to protect your camera from rain, use a polarizer to cut glare, meter for the highlights, and compose with foregrounds that glow in the muted light. This guide gives you the exact steps to do that.
Why Monsoon Light Beats Golden Hour
Golden hour is predictable. You know when it comes, and you know how it behaves. Monsoon light is the opposite. It is unpredictable, chaotic, and short lived. That is exactly why it produces some of the most dramatic landscape photographs you will ever take.
During the monsoon, the atmosphere is thick with moisture. Water droplets in the air scatter light differently than dry air. This creates soft, diffused shadows while maintaining intense color saturation in the sky. The clouds themselves become sculptural elements. You get layers of dark cumulonimbus, wispy mid level clouds, and bright breaks of sunlight that sweep across valleys.
The key difference is contrast. A clear sky gives you a simple gradient from blue to orange. A monsoon sky gives you a battle between light and dark. That tension is what makes a viewer stop and stare.
The Gear You Actually Need for Rainy Season Shooting
You do not need a fully sealed underwater housing for monsoon photography. But you do need to think about moisture differently than you would in a dry climate.
Camera body and lens considerations
Weather sealed bodies and lenses are worth the investment if you plan to shoot in Asia during the wet season. A camera like the Olympus OM System OM 1 or a Nikon Z8 with a sealed lens like the Nikon Z 24 70mm f/2.8 S will keep working through a light drizzle. But even without a fully sealed setup, you can shoot in heavy rain with the right accessories.
The bare minimum rain protection
- A rain cover designed for your camera. Think Tank Photo and Peak Design make reliable ones.
- A lens cloth in a sealed bag. Keep it dry between uses.
- Silica gel packets inside your camera bag. Replace them every few weeks during the season.
- A microfiber towel to dry the camera body between shots.
- A plastic grocery bag as a backup. It looks ugly but works in a pinch.
Filters matter more than usual
A circular polarizer is the single most useful filter for monsoon photography. It cuts the glare from wet leaves, rice paddies, and roads. It also deepens the blues and greens that become saturated after rain. A graduated neutral density filter helps when the sky is much brighter than the ground, which happens often during storm breaks.
For more on gear choices, read our guide on choosing the perfect camera gear for capturing Asia’s stunning landscapes.
How to Read the Sky for Storm Light
Monsoon weather moves fast. You cannot rely on a morning forecast to tell you where the light will be at 4 PM. You need to read the sky in real time.
Three signs that storm light is coming
- Thick clouds with a bright edge. When the sun is behind a cloud bank but the edge of the cloud glows white or yellow, light is about to break through. Get into position.
- Rain curtains with gaps. If you can see rain falling in the distance but there is a clear patch of sky above or beside it, that patch will create a beam of light. Move toward that beam.
- Sudden wind shifts. A change in wind direction often precedes a break in the clouds. The wind clears the lower atmosphere and lets sunlight punch through.
A simple exposure strategy for storm light
The biggest mistake photographers make during monsoons is exposing for the shadows. The human eye adjusts to dark foregrounds, but the camera does not. If you expose for the dark rice paddy, the sky will blow out completely.
| Situation | Metering tip | Common mistake |
|---|---|---|
| Bright sky, dark foreground | Spot meter the sky, then add +1 stop | Exposing for the foreground and blowing the sky |
| Light rays breaking through clouds | Spot meter the brightest part of the beam | Under exposing the foreground so it goes black |
| Overcast with small bright patch | Use a graduated ND filter to balance | Forgetting to recompose after placing the filter |
| After rain, wet surfaces reflecting | Use a polarizer to control glare | Leaving the polarizer on in low light and losing two stops |
“The monsoon is not a time to fight the weather. It is a time to work with it. The best shots come when you stop trying to make the scene look like a sunny day and start embracing the mood of the storm.” David Lazar, Nature’s Best Photography Asia contributor
Composition Techniques for Moody Monsoon Landscapes
Monsoon light changes the way you should compose a scene. The rules of thirds and leading lines still apply, but you have new tools to work with.
Use the mist as a natural diffuser
After a heavy rain, mist rises from valleys and rice terraces. That mist softens distant mountains and creates depth. Compose with a strong foreground element, a midground layer of mist, and a dramatic sky in the background. This three layer composition works every time.
Look for reflections in standing water
Monsoon rains leave puddles everywhere. Rice paddies flood. Roads turn into mirrors. Use these surfaces to reflect the sky. A puddle the size of a dinner plate can become the focal point of a wide angle shot if you get low enough.
Include human elements for scale
A farmer walking through a flooded field with an umbrella. A fisherman casting a net against a dark sky. A child riding a bicycle through a puddle. These small human figures give the storm scale. Without them, the sky just looks big. With them, it looks massive.
For more on composition in difficult conditions, check out our 7 composition tips for stunning wide angle landscape shots in Asia.
A Practical Process for Shooting Through the Storm
You cannot wait for perfect conditions. You have to work through the rain and grab the shots when they appear.
Step by step workflow
- Scout before the rain. Find your composition on a dry morning or the day before. Note where the light will come from and where you can stand to stay partially sheltered.
- Set up with rain protection on. Attach your rain cover before you leave the car or hotel. It is harder to put on once the rain starts.
- Shoot in bursts during breaks. Monsoon light comes in windows of two to five minutes. Shoot a bracket of three exposures every time the light changes. You can blend them later.
- Check your lens every ten minutes. A single raindrop on the front element will ruin a whole sequence. Wipe it dry between bursts.
- Review on the back of the camera, not the LCD. Histograms are your friend. If the highlights are clipped, adjust your exposure compensation immediately.
Where to Shoot Monsoon Landscapes in Asia
Some locations are built for monsoon photography. The landscape itself responds to the rain in ways that make your job easier.
- Sapa, Vietnam. The terraced rice fields flood during the monsoon, creating mirror like surfaces that reflect the sky. The mist moves through the valleys in waves.
- Ubud, Bali. The rainforest canopy and temple gates look saturated and alive after rain. The afternoon storms are predictable, usually arriving around 2 PM.
- Luang Prabang, Laos. The Mekong River rises and the mist sits low over the water. The temples and mountains become layered silhouettes.
- Kerala, India. The backwaters and tea plantations of Munnar turn intensely green. The light during the monsoon is soft and even, great for intimate landscapes.
For more specific locations, read about 5 secret spots for misty morning landscape photography in Vietnam.
The Biggest Mistake Photographers Make During Monsoons
They pack up too early. The rain starts, and they assume the light is gone. But the most dramatic light often comes right after the heaviest rain. The clouds break. The sun drops low. The whole landscape glows.
Stay out for at least thirty minutes after a storm passes. That is when the light is at its richest. The ground is wet, which means reflections are everywhere. The air is clear of dust. The colors are saturated.
Another common mistake is forgetting to protect your gear when you are not shooting. Condensation forms when you move from a cold, rainy environment into a warm car or hotel room. Seal your camera in a dry bag with silica gel before you go inside. Let it warm up slowly. Otherwise, you will spend the next morning cleaning fungus off your lens.
Post Processing Monsoon Images Without Losing the Mood
Monsoon images should feel moody. Do not overcook them.
A simple editing approach
- Lower the clarity slightly. This preserves the soft, atmospheric feel of the mist and rain.
- Add contrast to the sky, not the ground. Use a graduated filter in Lightroom or Capture One to darken the sky and bring out cloud texture.
- Desaturate the greens just a little. Wet vegetation can look unnaturally bright. A small desaturation makes it look more natural.
- Keep the shadows dark. Monsoon light has high contrast. Embrace it. Lifting all the shadows makes the image look flat and processed.
For a full walkthrough of editing techniques, see our guide on mastering Asian landscape photography edits for stunning results.
Turning Monsoon Frustration Into Your Best Work
The monsoon tests your patience. It tests your gear. It tests your willingness to stand in the rain for hours waiting for a ten second window of light. But that is exactly what separates good landscape photographers from great ones.
The photographers who come back with stunning monsoon shots are the ones who accepted that they would get wet. They planned for it. They brought the right rain protection. They scouted in the dry moments and shot in the wet ones. They did not complain about the weather. They used it.
Next time you see a storm rolling in over a landscape, do not pack up. Set up. That dark cloud is about to give you the best light of your trip.
Your Monsoon Photography Checklist for 2026
Before you head out for your next monsoon shoot, run through this checklist.
- Weather sealed camera or rain cover
- Circular polarizer
- Graduated ND filter (2 or 3 stop)
- Lens cloth and microfiber towel
- Silica gel packets
- Plastic bag for backup protection
- Histogram review every five shots
- Spot meter set to highlight priority
- Patience for the thirty minutes after the storm
Monsoon photography is not about avoiding the rain. It is about learning to see the light that the rain brings. That light is rare, dramatic, and absolutely worth getting wet for.