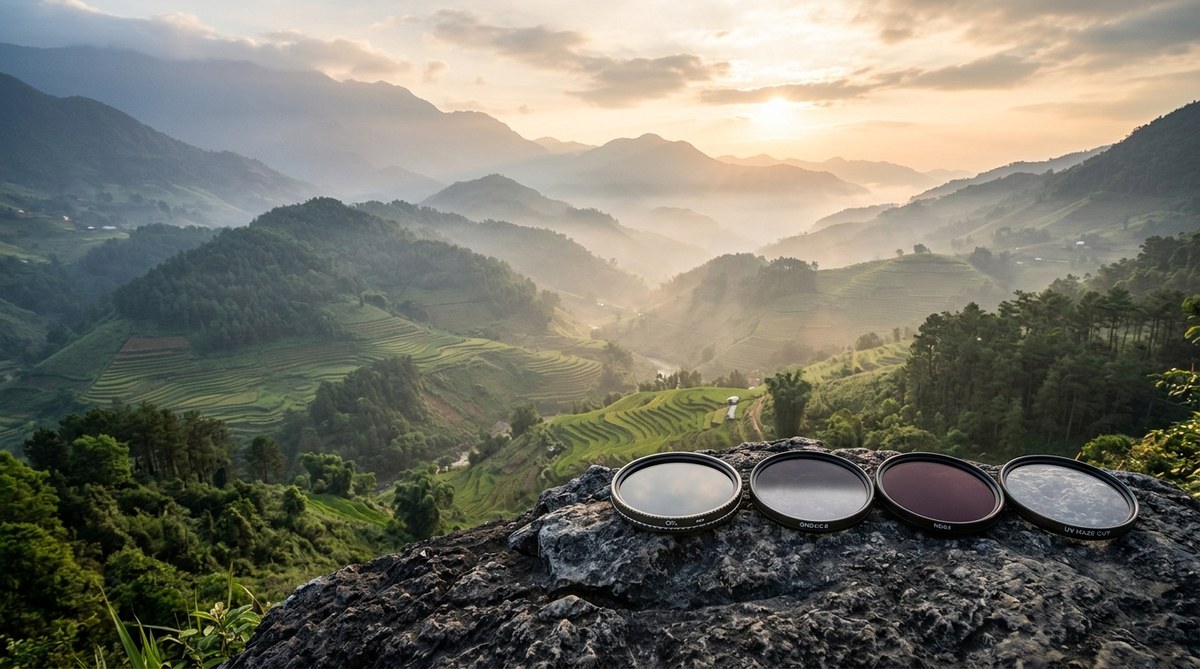
You are standing at the edge of a rice terrace in northern Thailand. The sun is rising, painting the sky in shades of orange and pink. But between you and that perfect shot, there is a wall of milky white haze. Humidity and tropical heat have turned the air into soup. Your lens sees nothing but soft blur.
This is the reality of shooting in Southeast Asia. The best cameras and sharpest lenses cannot fix what the atmosphere does to light. But the right piece of glass threaded onto your lens can. Here is how to choose the best filters for landscape photography when the air is thick enough to drink.
Cutting through tropical haze requires more than a UV filter. A circular polarizer removes scattered light from water particles in the air, while a solid neutral density filter lets you use longer exposures to smooth out atmospheric turbulence. For the worst conditions, a dedicated haze or infrared filter delivers the most dramatic clarity. Pair any filter with a lens hood and you will see immediate results in your Asian landscape shots.
Why Haze Beats Most Lenses
Haze is not dust on your glass. It is light bouncing off water vapor and tiny particles suspended in the air. In places like Bangkok, Ho Chi Minh City, or the jungles of Laos, humidity often sits above 80 percent. That moisture scatters blue light more than red or green light.
This scattering causes two problems. First, your image loses contrast. The blacks turn gray and the whites look muddy. Second, the image gets a blue color cast that is difficult to fix in post without making the rest of the photo look unnatural.
No amount of sharpening in Lightroom can bring back contrast that was never recorded. That is why the best filters for landscape photography fix the problem in camera, not on your computer.
The Four Filters That Actually Work
Not all filters are equal when the air is thick. Here are the four types that will save your images on a hazy day.
1. Circular Polarizer (CPL)
A circular polarizer is the single most useful filter for haze. It works by blocking light waves that have been scattered in a specific direction. When you rotate the filter, you can selectively remove the glare from water droplets in the air.
In practice, this means the sky turns a deeper blue and clouds pop with more definition. Green foliage loses its shiny, washed-out look and becomes saturated. The effect is immediate and visible through the viewfinder.
For Southeast Asian landscapes, a CPL is essential for shooting over water. If you are photographing the limestone karsts of Ha Long Bay or the floating markets of the Mekong Delta, a polarizer will cut through the surface glare and let you see the reflections beneath.
What to look for: Choose a multi-coated CPL to avoid adding flare. Brands like B+W, Hoya, and Breakthrough Photography make solid options. A 77mm size covers most standard lenses.
2. Solid Neutral Density (ND) Filter
A solid ND filter reduces the amount of light entering the lens evenly across the frame. On a hazy day, this helps in two ways.
First, longer exposures smooth out the turbulent air. When you shoot at 1/1000th of a second, the haze looks like static noise in the image. But if you use a 10-stop ND filter and shoot a 30-second exposure, the moving haze particles blur into a smooth, soft gradient that looks natural.
Second, an ND filter lets you shoot at wider apertures in bright light. This can help separate your foreground subject from the hazy background by creating a shallow depth of field.
What to look for: A 6-stop or 10-stop ND filter is the most versatile. The LEE Filters Little Stopper and the Formatt-Hitech Firecrest series are reliable choices. Magnetic systems from K&F Concept are convenient for quick changes.
3. Graduated Neutral Density (GND) Filter
Haze is rarely uniform across the frame. It tends to be thicker near the horizon and thinner in the sky directly above you. A graduated ND filter has a dark top half that transitions to clear glass at the bottom.
This helps balance the exposure between a bright, hazy sky and a darker foreground. Without a GND, you either blow out the sky or lose detail in the shadows. With one, you can capture detail in both areas in a single shot.
For landscape photographers in Asia, a soft-edge GND works best because the transition is gentle and matches the gradual change in haze density.
What to look for: A 3-stop (0.9) soft-edge GND is a good starting point. The Cokin Z-Pro series and the NiSi filter system offer high-quality glass options.
4. Haze or Infrared Filter
When the haze is so thick that a polarizer cannot fix it, you need a dedicated haze filter. These filters are designed to absorb the blue and ultraviolet light that causes atmospheric haze. They are sometimes called UV or skylight filters, but the good ones go beyond basic UV protection.
An infrared filter takes this concept further. It blocks visible light and only lets infrared light pass through. The result is a black-and-white image with incredibly clear skies and white foliage. Infrared photography is a niche technique, but it is the most effective way to completely eliminate haze.
What to look for: The Hoya R72 infrared filter is the standard choice for IR photography. For a standard haze filter, look for one labeled “haze” or “skylight” with a warm tint (like the 1A or 1B filters).
How to Choose the Right Filter for the Situation
Not every hazy day calls for the same filter. Here is a simple decision guide.
| Condition | Best Filter | Why |
|---|---|---|
| Light haze, high humidity | Circular polarizer | Removes scattered light from water vapor |
| Thick haze, flat light | Solid ND filter (10-stop) | Smooths out atmospheric turbulence |
| Bright haze over bright sky + dark ground | Graduated ND filter | Balances exposure between sky and land |
| Extreme haze, no contrast | Haze or infrared filter | Absorbs blue light or bypasses visible haze entirely |
Common Mistakes Photographers Make
Even with the right gear, it is easy to mess up. Avoid these pitfalls.
- Using a cheap UV filter as a haze fix. A basic UV filter does almost nothing for haze. It protects your front element but will not improve clarity. You need a multi-coated polarizer or a dedicated haze filter.
- Forgetting to remove the lens hood. A hood is your first line of defense against flare and stray light. But if you stack a polarizer and a hood, the hood can block the filter ring and prevent rotation. Remove the hood, rotate the filter, then hold your hand above the lens to shade it.
- Layering too many filters. Each piece of glass adds a chance for flare and reduces sharpness. Use one filter at a time unless you really need two. Stacking a polarizer on top of an ND filter can create vignetting on wide-angle lenses.
Expert advice from a working travel photographer: “I spent three months shooting across Vietnam and Thailand. The single best investment I made was a high-quality circular polarizer. It turned milky skies into deep blue, and it made the green of the rice paddies look like velvet. Do not buy the cheapest one. Buy the best one you can afford, because it will live on your lens.” – Tanya R., Southeast Asia travel specialist
A Step-by-Step Workflow for Hazy Conditions
Here is a practical process to follow when you arrive at a hazy location.
- Assess the haze. Hold your hand up to the sky. Can you see a clear shadow? If yes, the haze is light. Use a polarizer. If no, the haze is heavy. Go for a solid ND or haze filter.
- Mount the filter. Screw it on carefully. Do not cross-thread the ring. If you are using a square filter system, slide the holder into place.
- Rotate the polarizer. Look through the viewfinder and turn the filter until the sky darkens and the glare on foliage disappears. The effect is strongest at 90 degrees to the sun.
- Check your exposure. A polarizer costs about 1 to 2 stops of light. An ND filter costs more. Adjust your shutter speed and ISO accordingly.
- Shoot and review. Take a test shot. Zoom in on the LCD to check for sharpness and contrast. If the haze is still visible, switch to a stronger filter or use a longer exposure.
When Not to Use Filters
Filters are not always the answer. Here are times to leave them in the bag.
- Shooting directly into the sun. Filters add flare. A polarizer can actually make flare worse by scattering light inside the glass.
- Low light or blue hour. A polarizer steals 1 to 2 stops of light. In dim conditions, you need every photon. Skip the filter and fix the color cast in post.
- If you forgot to clean them. A smudged filter destroys contrast faster than haze. Carry a microfiber cloth and clean your glass before every use.
Building Your Filter Kit for Asia
If you are starting from scratch, here is a practical kit that covers most situations.
- A 77mm circular polarizer (multi-coated)
- A 10-stop solid ND filter (screw-on or square)
- A 3-stop soft-edge graduated ND filter (square system)
- A lens hood that fits your widest lens
- A microfiber cloth and a small air blower
This kit is small enough to fit in a jacket pocket. It will handle everything from the misty mountains of Sapa to the humid coastlines of Vietnam.
For more detailed location-specific advice, check out our guide on shooting Ha Long Bay at sunrise for travel and landscape photography. And if you are planning a trip across multiple countries, our article on planning your golden hour shots across Southeast Asia by season will help you time your shoots for the clearest air.
Your First Step Toward Clearer Images
The best filters for landscape photography are the ones you actually use. Start with a circular polarizer. Spend a day shooting in your local park or a nearby lake. Rotate the filter and watch how the colors change. Learn to see the difference between good light and filtered light.
Once you understand how a polarizer behaves, add an ND filter. Try a 10-stop and shoot a waterfall or a busy street scene. The long exposure will reveal a world of motion you never noticed before.
Haze is part of shooting in Asia. It is not a problem to be fixed. It is a condition to be managed. With the right filter, you can turn a hazy morning into a soft, atmospheric masterpiece. Go out this weekend, put a filter on your lens, and see what you have been missing.