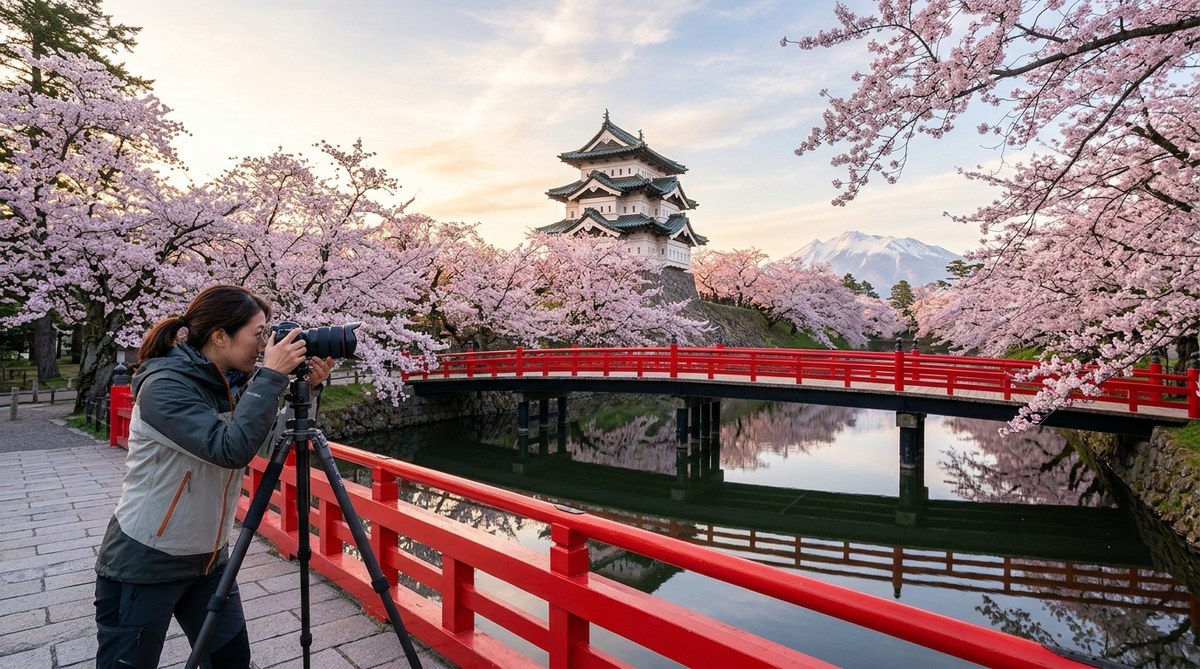
The first time you see a cherry blossom tree in Japan, it stops you cold. The branches are so loaded with pink petals that the trunk almost disappears. The air feels soft, and the light filters through the canopy like stained glass. But then you pull up your camera, snap a shot, and the photo looks flat. The magic is gone. That is the moment most travelers realize that photographing sakura is a skill, not a lucky break.
You are planning a trip to Japan in spring 2026, and you want to come home with images that make your friends ask, “Wait, you took that?” This guide covers the essential cherry blossom photography tips Japan 2026 travelers need to capture the season at its finest. We will talk about timing, gear, composition, and the small tricks that turn a good photo into a great one.
Cherry blossom photography in Japan relies on three things: precise timing with the bloom forecast, early morning or late afternoon light, and a willingness to move your feet. You do not need expensive gear. You do need patience. The best shots often come from 50 yards away from the main crowd, where the trees are undisturbed and the light is yours alone.
Understanding the Bloom Window for 2026
Cherry blossoms are not patient. You get about one week of peak bloom at each location, and the timing shifts every year based on winter temperatures. For 2026, the Japan Meteorological Corporation typically releases its first forecast in January. Bookmark that page. Check it weekly as your trip gets closer.
The general rule for 2026 is this: Tokyo peaks around the last week of March. Kyoto follows in the first week of April. Northern spots like Hirosaki and Matsumae peak in late April or early May. If you are flying in from the United States, plan your itinerary so you have at least a few days of buffer on each end. A cold snap can delay blooms, and warm weather can rush them.
Do not put all your eggs in one park. Spread your photography days across three or four locations within a region. If you miss peak at one spot, another might be a day or two behind.
Gear That Will Actually Help You
You do not need a $3,000 camera to get beautiful sakura photos. But a few pieces of gear will make your life easier.
- A standard zoom lens (24-70mm or 24-105mm) covers most situations. Wide for the landscape, zoom for the details.
- A polarizing filter. This is the single most useful accessory for spring photography. It cuts glare off leaves and petals, deepens the blue sky behind the blossoms, and makes colors pop without editing.
- A lightweight tripod. You will use it for low-light shots at sunrise and sunset. Also useful for long exposures if you want to blur the motion of people walking through the scene.
- A lens hood. Spring in Japan can be bright. A hood reduces lens flare when the sun is just outside your frame.
If you want to read more about choosing the right setup for different conditions, check out this guide on choosing the perfect camera gear for capturing Asia’s stunning landscapes.
Camera Settings for Sakura Scenes
Cherry blossoms are tricky because they are mostly white and pink. The camera’s light meter can get confused and overexpose the petals, turning them into a washed-out blob.
Here is a simple process to follow:
- Set your camera to aperture priority mode. Choose an aperture between f/5.6 and f/8 for a single tree or branch. This gives you enough depth of field to keep the blossoms sharp while blurring the background slightly.
- Use exposure compensation at +0.3 or +0.7. Yes, the meter might say the scene is bright, but the petals need that extra light to look clean and airy.
- Set your white balance to “Daylight” or “Cloudy” depending on the weather. Cloudy adds a little warmth that helps the pink tones.
- Focus on the nearest blossom or branch. If the camera hunts for focus, switch to manual and dial it in yourself.
For wide landscape shots with Mount Fuji or a temple in the background, stop down to f/11. This keeps everything from the foreground blossoms to the distant mountain in focus.
The Best Locations for 2026 Photography
Some spots are famous for a reason. Others are quieter and give you room to work.
- Mount Fuji area (Kawaguchiko). The classic shot is a cherry tree in the foreground with Fuji behind it. Go at sunrise. The crowds are thin, and the light hits the mountain first.
- Philosopher’s Path in Kyoto. This is a canal walk lined with cherry trees. It gets busy, but early morning (before 7 a.m.) gives you empty paths and soft light.
- Hirosaki Castle Park in Aomori. This is further north, so it blooms later. The castle moat is covered in fallen petals, creating a pink carpet on the water.
- Mount Yoshino in Nara Prefecture. Over 30,000 cherry trees cover the mountainside. You can shoot from the bottom looking up, or from a higher trail looking down over the canopy.
For more ideas on capturing dramatic landscapes, take a look at this article on how to capture dramatic Asian sunrise and sunset landscapes in 2026.
Composition Tricks That Work Every Time
You can have perfect settings and still end up with boring photos. Composition is what separates a snapshot from a photograph.
- Find a frame. Use branches, temple gates, or even other tourists’ umbrellas to frame your subject. A foreground branch that arches over the scene adds depth.
- Get low. Kneel down or place your camera on the ground. Shoot upward through the branches. This makes the tree look huge and fills the sky with petals.
- Include a person. A single person walking under the blossoms gives the photo scale. Without a reference point, the tree just looks like a pink blob.
- Look for reflections. Puddles, canals, and ponds reflect the blossoms. Put your camera low to the water and use a polarizer to reduce glare on the surface.
Common Mistakes and How to Fix Them
Here is a table that breaks down the most frequent errors photographers make during cherry blossom season and the simple fix for each one.
| Mistake | What Happens | The Fix |
|---|---|---|
| Shooting at noon | Harsh shadows, blown highlights | Shoot within one hour of sunrise or sunset |
| Using auto white balance | Colors look cold or green | Switch to “Cloudy” or “Shade” for warmth |
| Focusing on the background | Blossoms are soft | Manually focus on the nearest petal |
| Including too much sky | Sky is brighter than the blossoms | Compose so the sky fills less than a third of the frame |
| Shooting wide all the time | Photos lack variety | Alternate between wide, medium, and close-up shots |
| Ignoring the wind | Blurry petals | Use a shutter speed of 1/250 or faster on breezy days |
Why Golden Hour Is Non-Negotiable
The light during the hour after sunrise and the hour before sunset is softer, warmer, and more directional. It hits the blossoms from the side, creating texture and depth. Midday sun comes from directly overhead and flattens everything.
If you are staying in a city like Tokyo or Kyoto, set your alarm for 5 a.m. at least two mornings. The parks are empty, the birds are active, and the light is perfect. You can be back at your hotel by 8 a.m. with a memory card full of keepers.
“The difference between a good cherry blossom photo and a great one is usually just 45 minutes. If you show up at sunrise, you have the place to yourself and the light is already doing half the work.” — Yuki Tanaka, landscape photographer based in Kyoto
For more on how to use early light effectively, read this piece on mastering the art of golden hour landscape photography in Asia.
Night Photography Under the Blossoms
Many parks in Japan illuminate the cherry trees at night with lanterns or floodlights. This is called “yozakura,” and it is a completely different look.
Bring your tripod. Set your ISO to 800 or 1600. Use a shutter speed of one to four seconds depending on how bright the lights are. The key is to let the background go dark while keeping the blossoms properly exposed. If the lights are warm yellow, adjust your white balance to “Tungsten” to make the pink tones stand out.
Night shots work best when there is a clear sky. Clouds can block the moonlight and make the background look muddy.
What to Do When the Weather Turns
Spring in Japan is unpredictable. You might get rain, clouds, or even a cold snap that delays the bloom.
Do not pack up your camera. Overcast skies act like a giant softbox. The light is even and diffused. Colors look more saturated because there are no harsh shadows. Rain creates droplets on the petals and reflections on the ground. Some of the most atmospheric cherry blossom photos are taken in the rain.
If the wind picks up, you can capture the falling petals. Use a fast shutter speed (1/500 or higher) to freeze the motion. Or use a slow shutter speed (1/15 or slower) to create a blur of pink streaks. Both look great.
Editing Your Cherry Blossom Photos
You can improve almost any photo with a few small edits. Do not overdo it. The goal is to make the image look like what you saw, not to invent a new reality.
- Boost the contrast slightly. This separates the petals from the background.
- Increase the saturation on the pink channel only. Leave the greens and blues alone.
- Add a small amount of sharpening. This brings out the texture of the petals.
- Crop out distractions. A trash can, a sign, or a tourist in a bright jacket can ruin an otherwise perfect shot.
For a more detailed look at post-processing, check out this guide on mastering Asian landscape photography edits for stunning results.
Building a Shot List for Your Trip
Before you leave home, write down five specific shots you want to get. This keeps you focused when the scenery is overwhelming.
- A wide landscape with a landmark (temple, mountain, bridge) and blossoms
- A close-up of a single branch with the sky as background
- A reflection shot in water
- A night shot with artificial lighting
- A candid shot of a local person or family under the trees
Having a list stops you from wandering aimlessly. You can check off each one and then spend the rest of your time experimenting.
Understanding the Crowds
Japan’s cherry blossom season is a national event. Parks fill up fast. The most famous spots, like Shinjuku Gyoen in Tokyo or Maruyama Park in Kyoto, can feel like a festival.
Your best strategy is to arrive before the gates open. Most parks open between 5 a.m. and 6 a.m. during peak season. The first hour is quiet. By 9 a.m., the tripods are three deep along the main paths.
If you want solitude, look for smaller temples and shrines. Many have a single cherry tree in the courtyard. The tree might not be as large, but you can photograph it without anyone else in the frame.
Final Packing Reminder
Here is a short list of things to pack that you might not think about:
- A small umbrella. It keeps your gear dry and doubles as a prop in photos.
- Hand warmers. Spring mornings in Japan are cold, especially near Mount Fuji.
- Extra batteries. Cold weather drains them faster.
- A microfiber cloth. Petals and pollen get on your lens constantly.
Your Best Cherry Blossom Photos Start Now
The 2026 season will be here before you know it. Start checking the bloom forecasts in January. Book your accommodations near parks so you can walk there at dawn. Practice your camera settings at home on white and pink flowers so you are not fumbling when you arrive.
Cherry blossom photography is not about having the best camera. It is about being in the right place at the right time, and knowing what to do when you get there. You already have the motivation. Now you have the plan. Go make images that capture the feeling of spring in Japan.