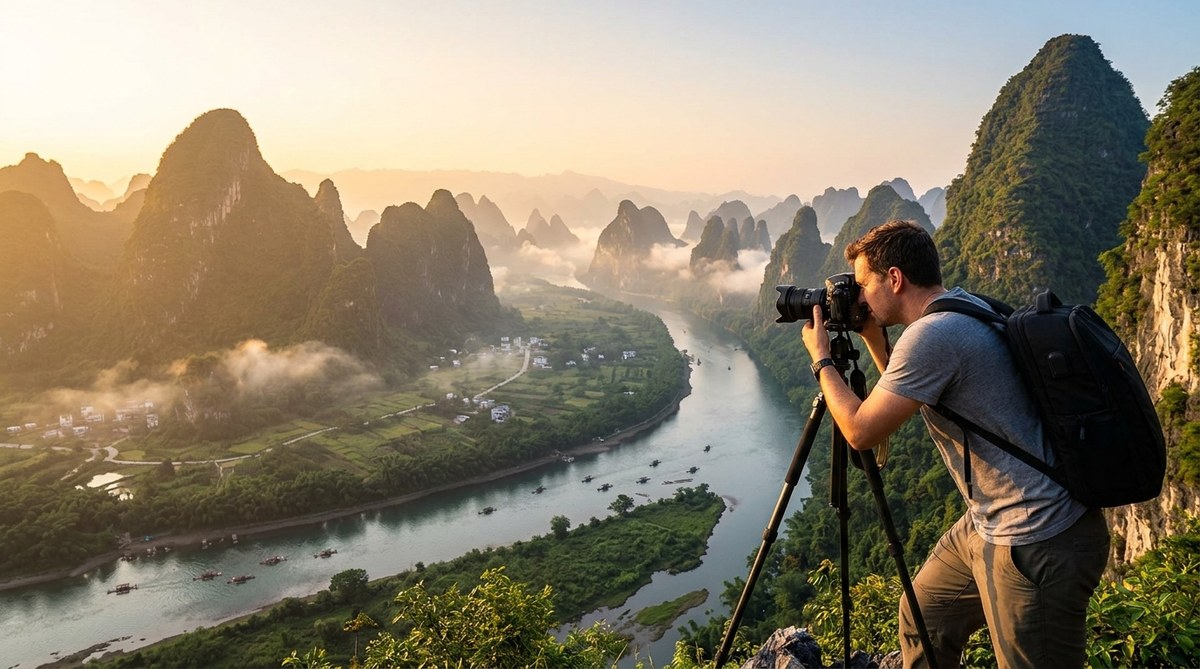
A misty morning on the Li River. Towering limestone peaks rise from the fog like ancient painted scrolls. Green rice paddies stretch to the base of sheer cliffs. This is China’s karst landscape, and it has drawn photographers for decades. Getting the shot that feels both epic and intimate, however, takes more than just showing up at sunrise. The unique geology of karst formations creates challenges in haze, contrast, and scale that require a specific set of techniques.
To capture China’s karst mountains, focus on timing your visit for mist and low light, use telephoto compression to layer peaks, and expose for the highlights while pulling shadows during editing. Avoid midday flat light. The best results come from blending a wide-angle foreground with a compressed background using a long lens.
Understanding the Karst Puzzle
Limestone karst is soft rock that rain and rivers have carved over millions of years. The result: steep, isolated peaks, hidden caves, and winding waterways. These shapes are dramatic, but they also trap haze and moisture. You cannot treat a karst scene like a normal mountain range. The peaks often lack a single focal point, and the mist can turn a promising composition into a gray blob.
The key is to work with the mist, not against it. The very element that frustrates many photographers is what gives karst landscapes their signature ethereal quality. Your job is to use aperture and focal length to separate layers of atmosphere.
Before you pack your bag, consider the season. The rainy months from April to June produce the heaviest morning mist. Autumn, September through November, brings clearer air and golden light. Winter offers crisp air but lower water levels on the rivers. Each season gives a different mood.
Essential Gear for Karst Photography
You do not need an exotic camera, but certain tools make a noticeable difference.
- A tripod that is stable in wind and on uneven boat decks
- A telephoto zoom (70-200mm or 100-400mm) for stacking layers
- A wide-angle lens (16-35mm) for foreground leading lines
- A polarizing filter to cut glare off water and wet vegetation
- A neutral density (ND) filter for long exposures on rivers and waterfalls
If you shoot handheld, expect softer results in dim morning light. You can still get usable images, but a tripod gives you the flexibility to stop down for depth of field without raising ISO too high.
Timing the Mist: A Step-by-Step Process
The mist that makes karst look magical usually burns off by 9 a.m. on clear days. Here is a reliable workflow for planning.
- Check the weather forecast for humidity and temperature inversion the night before. A high dew point with calm wind predicts fog.
- Rise 90 minutes before sunrise to reach your location while it is still dark. This lets you set up during blue hour.
- Scout the stage where the mist will settle. Lower elevations along rivers and valleys gather the thickest fog. Higher vantage points let you look down on it.
- Shoot continuously from blue hour through golden hour. The mist changes character every ten minutes. A scene that looks flat at dawn may reveal dramatic layers as the sun climbs.
- Evaluate your histogram. Karst scenes often have a large dynamic range between bright sky and dark foothills. Expose to the right (ETTR) without clipping the highlights. You can pull back shadows in post.
Composition Techniques That Lift the Scene
Karst peaks repeat in a pattern. Without careful composition, your photo becomes a jumble of similar shapes. Use these strategies to create depth.
Start with a strong foreground. A boat, a twisted tree root, or a reflection in a paddy field anchors the viewer. Then let the mid-ground and background build the narrative. A wide-angle lens makes the foreground prominent, while a telephoto compresses the peaks into tight stacks.
Place the main peak off-center. The classic rule of thirds works well, but you can also try a centered composition if the peak is perfectly reflected in still water. Leading lines from rivers or terraced fields draw the eye inward. In Yangshuo, the Li River bends perfectly to guide the gaze toward the mountains.
Common Mistakes vs. Correct Approaches
| Mistake | Correct Approach |
|---|---|
| Shooting at midday when haze is flat | Shoot in the first two hours after sunrise or last two before sunset |
| Using a wide lens for everything | Combine wide for foreground with telephoto for compressed background |
| Including too many peaks in frame | Simplify to two or three distinct layers |
| Exposing for the mist and losing sky details | Use graduated ND filter or bracket exposures |
| Ignoring human elements for scale | Include a fisherman, a bamboo raft, or a pagoda to show scale |
Camera Settings That Cut Through Haze
Haze scatters light and reduces contrast. You can combat it with a few deliberate choices.
Select an aperture between f/8 and f/11 for sharpness across the frame. Karst scenes often have detail both near and far, so hyperfocal distance focusing works well. Focus one third into the frame to maximize depth of field.
Set your white balance to Daylight or a Kelvin around 5500K for morning light. Auto white balance can shift too warm in mist, making the scene look muddy. A slight cooling in-camera gives you a clean starting point.
Use a low ISO between 100 and 200. The tripod handles motion, so you do not need high ISO for shutter speed. If you want to smooth water or clouds, add an ND filter and extend exposure to 5 to 30 seconds.
“The challenge is making the mist feel like a layer, not a blur. I set my aperture to f/11 and focus on the closest peak. Then I wait for a breeze to thin the fog slightly. That moment of partial clarity reveals the shapes beneath.” — Lin Tao, landscape photographer based in Guilin
Post-Processing for Karst Scenes
Back home, your raw files need specific adjustments to bring out the drama.
First, adjust exposure and enhance contrast with a curves layer. Pull the shadow end down slightly and raise the midtone curve to add snap. In Lightroom or Capture One, increase the Dehaze slider by 10 to 20 points. Be careful not to overdo it or the mist looks artificial.
Second, use the HSL panel to target greens and blues. Karst vegetation can appear too yellow in mist. Desaturate yellow and increase luminance in green to restore natural color. For the sky, decrease blue luminance slightly to deepen the sky without making it too dark.
Third, dodge and burn selectively. The peaks that catch early light should be slightly brighter. The valleys should stay darker. This mimics the natural falloff of light in the landscape.
If you want to merge exposures for dynamic range, blend two raw files using luminosity masks. This preserves the soft gradient of fog while keeping the sky textured. Avoid HDR programs that create unnatural halos.
Putting It All Together in Guilin and Yangshuo
You have the theory. Now apply it to specific locations.
Xianggong Mountain offers one of the most photographed viewpoints of the Li River. Arrive early. Set up your tripod on the lower platform, not the crowded top. Use a 70-200mm lens to compress the row of peaks along the bend. Frame the shot so the river leads from the foreground into the distance.
For a different angle, rent a bamboo raft at dawn near Xingping. The raft moves slowly, so you can shoot handheld or rest the lens on a beanbag. Use a polarizer to remove glare from the water and reveal the reflection of the peaks. Include the fisherman in the frame for scale.
Do not forget the evening. The mountains behind Yangshuo glow warm during the last hour of daylight. Use a longer lens, 100-400mm, to isolate a single peak against the setting sun. The low angle creates a silhouette with orange and purple bands across the sky.
If mist is absent, head to the rice terraces near Longji. The layered fields mimic the shape of the peaks. This works as a foreground pattern that echoes the background hills.
For night photography, the karst pillars can frame the Milky Way in spring and summer. Use a fast wide-angle lens, set ISO 3200, and shoot 15-second exposures. The lack of light pollution in rural areas makes the stars pop. Combine this with the silhouette of a peak for a striking composition.
Check out our guide to capturing dramatic Asian sunrise and sunset landscapes in 2026 for more timing insights. If you plan to photograph waterfalls among the limestone, our article on vibrant Asian waterfall landscapes covers shutter speed and composition.
Your Next Karst Adventure
The beauty of karst mountains lies in their mystery. Peaks vanish and reappear. Light shifts from white to gold in minutes. By focusing on mist management, deliberate composition, and careful exposure, you turn that mystery into a photograph that says something true about the landscape.
Pack light. Wake early. Wait for the moment when the fog parts and the shape of the mountain becomes clear. That fraction of a second is worth all the planning. Apply these techniques, and you will come home with images that stand out from the crowd.
Now go shoot. The peaks are waiting.