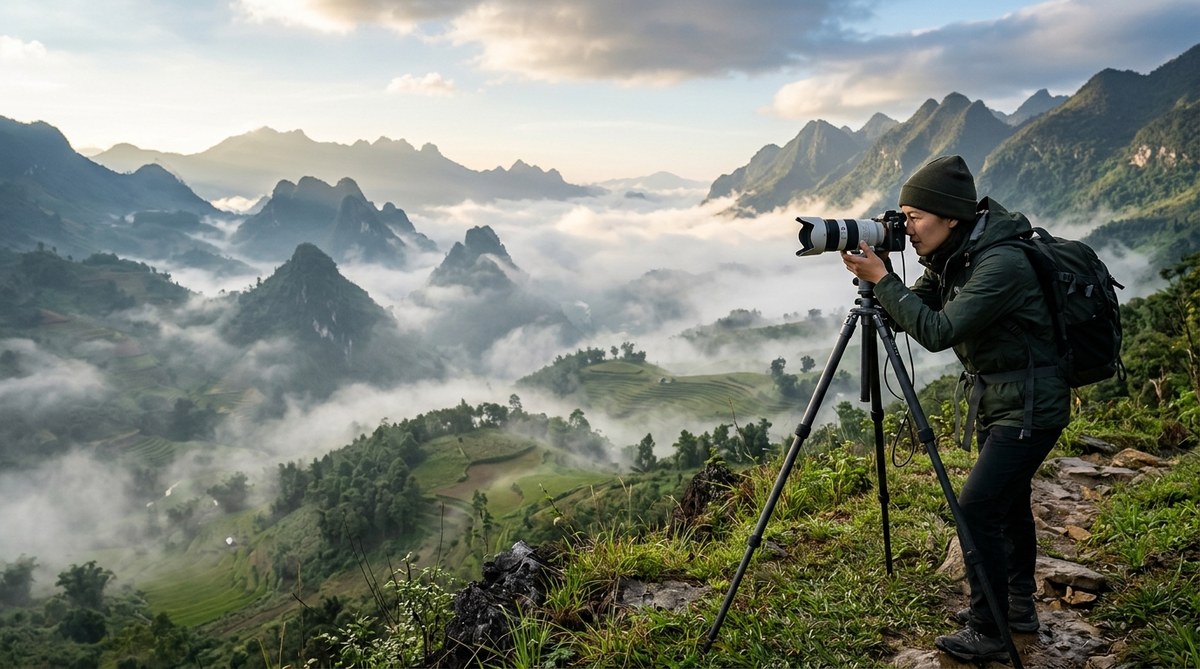
The first time I saw mist pour over a ridge in the Cameron Highlands, I forgot to press the shutter. That moment of stillness is exactly what draws landscape photographers to Asia’s misty highlands. The fog turns ordinary hills into layered paintings. Peaks become islands in a sea of cloud. Light diffuses into a soft glow that flatters every element in the frame. If you want to bring home images that feel more like dreams than documents, you need more than luck. You need a plan for reading the weather, choosing the right gear, and composing with atmosphere in mind.
Success in misty highlands photography comes from preparation and patience. Focus on the golden hours after sunrise and before sunset. Use negative space to emphasize depth. Pack a polarizer and a sturdy tripod. Scout locations on Google Earth before you travel. Always carry a rain cover for your camera. The best shots happen when you embrace the fog instead of fighting it.
Understanding How Mist Changes Your Light
Mist is not your enemy. It is a natural diffuser that softens harsh shadows and wraps colors in a muted palette. In the highlands of Southeast Asia, mist typically forms overnight and burns off by mid-morning. That window between 5:30 AM and 8:30 AM is your prime shooting time.
The science is simple. Warm air meets cooler ground temperatures and condenses into tiny water droplets. Those droplets scatter light. The result is lower contrast and reduced saturation. Instead of fighting this, lean into it. Underexpose by about one stop to keep the mist looking white instead of washed out gray. Your camera’s meter will try to brighten the scene, but you know better.
Essential Gear for Shooting in Fog and Drizzle
Asia’s highlands are humid. Your gear will get wet. Here is what you need to pack for a successful trip.
- A weather sealed camera body (mirrorless or DSLR)
- A fast prime lens (35mm or 50mm f/1.8 works well for layered compositions)
- A polarizing filter to cut through haze and deepen greens
- A sturdy carbon fiber tripod that won’t rust
- Lens wipes and a microfiber cloth in a sealed bag
- Silica gel packs inside your camera bag
- A rain cover or a plastic bag with a hole for the lens
Do not bring gear you cannot afford to get damp. The mist will find every seam. If you are still deciding what to carry, read our guide on choosing the perfect camera gear for capturing Asia’s stunning landscapes.
A Step by Step Process for Capturing Misty Highlands
Follow these steps when you arrive at a location. They will help you work efficiently before the light changes.
- Arrive 45 minutes before sunrise. Use a phone app like PhotoPills to confirm the sun position. Set up your tripod while it is still dark.
- Take a test shot at ISO 1600 to check composition. Review the histogram. Adjust your framing so the mist sits in the middle third of the image.
- Switch to your base ISO and shoot in aperture priority mode. Use f/8 to f/11 for maximum sharpness across the frame.
- Bracket your exposure. Take three shots at -1, 0, and +1 EV. This gives you options when blending later.
- Wait for movement. Mist flows like water. Watch for a gap that reveals a distant ridge or a pagoda. That is your moment.
- Review and adjust. Check your focus by zooming in on the LCD. Refocus if the mist has shifted the plane of focus.
Where to Find the Best Misty Highlands in Asia
Not all highlands are created equal. Some locations produce consistent morning fog almost year round. Others are seasonal. Here are five reliable spots for 2026.
| Location | Best Season | Mist Frequency | Difficulty |
|---|---|---|---|
| Cameron Highlands, Malaysia | December to February | High | Easy |
| Sapa, Vietnam | September to November | Very High | Moderate |
| Yangon Hills, Myanmar | November to January | Medium | Easy |
| Bumthang Valley, Bhutan | March to May | High | Hard |
| Taman Negara, Malaysia | June to August | Medium | Moderate |
The Cameron Highlands offer the easiest access for most travelers. You can drive directly to tea plantations and find mist almost every morning. For a deeper guide on this location, check out what makes the Cameron Highlands the ultimate misty landscape photography destination.
Composition Techniques That Work With Fog
Standard landscape rules still apply, but mist changes how you use them.
Negative space becomes your best tool. A large area of soft white fog draws the eye to the one visible element. Place a single tree or a small hut in the lower third. Let the mist fill the rest.
Leading lines disappear in fog. Instead, use layers. Frame a foreground element like rice terraces, then a middle layer of mist, then a faint peak above. The human brain loves decoding depth.
Shoot vertically more often. Portrait orientation stacks those layers in a way that feels natural to the eye. It also removes distracting sky.
Look for silhouettes. When the mist is thick, expose for the brightest part of the frame. Everything else turns into a dark shape. A farmer walking with a conical hat becomes a powerful graphic element.
For more ideas on framing, read our article on 7 composition tips for stunning wide-angle landscape shots in Asia.
Common Mistakes and How to Avoid Them
Even experienced photographers make errors when shooting in mist. Here is a table of the most frequent problems and their fixes.
| Mistake | Why It Happens | The Fix |
|---|---|---|
| Overexposed fog | Camera meter tries to brighten the white | Dial in -0.7 to -1.0 EV compensation |
| Flat colors | Mist scatters light and reduces saturation | Add contrast in post, or use a polarizer |
| Soft focus | Autofocus hunts in low contrast scenes | Switch to manual focus and use live view |
| Wet lens | Condensation forms when moving from cold to warm | Let gear acclimate in a sealed bag for 30 minutes |
| Boring composition | Too much fog with no subject | Wait for a focal point to emerge, or create one with a person |
“The best mist shots are not accidents. They are the result of patience and knowing when the fog will lift just enough to reveal a story.” — Ming Thein, landscape photographer
Post Processing for Misty Landscapes
When you get back to your laptop, resist the urge to crank up contrast. Misty images should feel soft. Here is a workflow that preserves the mood.
- Start with the middle exposure from your bracket. Use the darker frame if the mist looks blown out.
- Drop the highlights slider. This brings back detail in the white fog.
- Raise the shadows slightly. Just enough to see texture in dark foreground elements.
- Add a subtle S curve. Increase contrast in the midtones only. Leave the highlights and shadows alone.
- Reduce clarity. Yes, reduce it. A clarity value of -10 to -20 makes the mist feel more natural.
- Desaturate greens a touch. Asian highlands can look too vibrant in post. Pull the green saturation down by 10 points.
For a full editing workflow, see mastering Asian landscape photography edits for stunning results.
Packing for a Week in the Highlands
Your clothing matters as much as your camera bag. Misty highlands are cold in the morning and warm by noon. Pack layers.
- A waterproof shell jacket
- A fleece mid layer
- Lightweight hiking pants that dry fast
- Waterproof boots with good grip
- A headlamp for predawn hikes
- Snacks and a thermos of tea
Do not forget a backup storage solution. Bring two 128GB memory cards and a small laptop or tablet for backup. Cloud storage is unreliable in remote areas.
Final Thoughts on Photographing Asia’s Misty Highlands
The best images from the misty highlands are not the ones with perfect clarity. They are the ones that leave something to the imagination. A half visible temple. A ridge that disappears into white. A single figure walking through fog. These images linger because they ask the viewer to fill in the gaps.
Plan your trip around the monsoon patterns of your chosen location. Arrive early. Shoot with intention. Let the mist be your collaborator, not an obstacle. And when you get home, take your time editing. The magic is already in the frame. All you need to do is bring it out.
If you want to explore more locations, check out 5 secret spots for misty morning landscape photography in Vietnam and how to photograph the misty mountains of Taiwan’s Taroko Gorge in 2026.