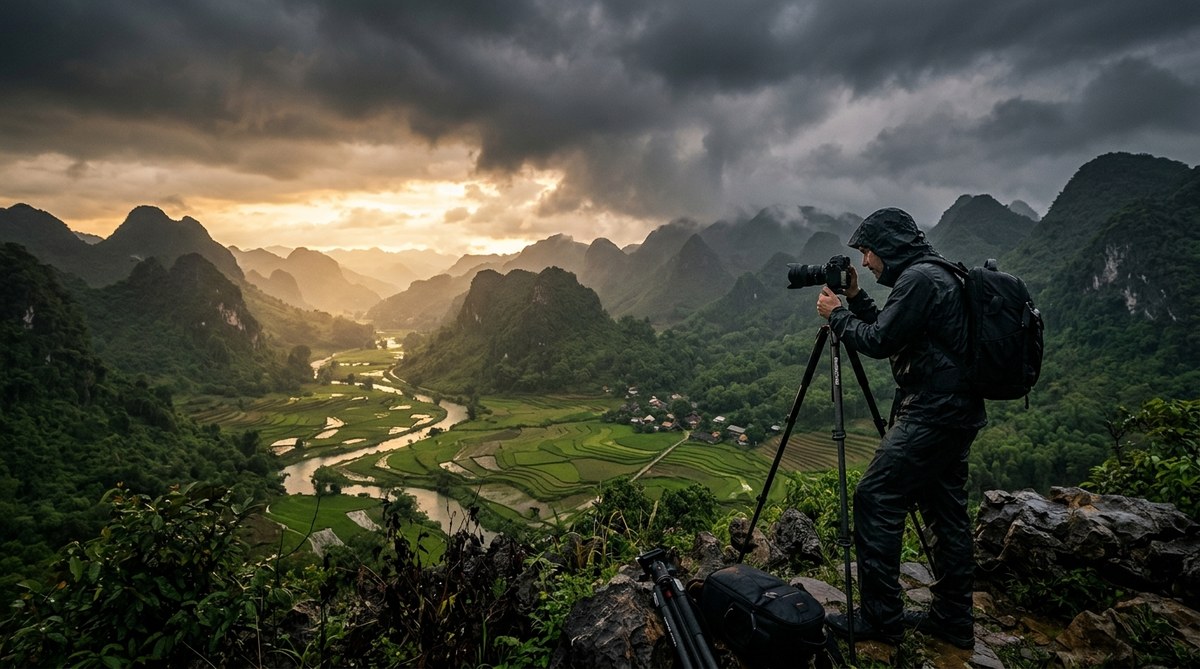
The air gets thick with electricity. Clouds stack into towers of charcoal and pearl. Then the sky tears open. For most people, monsoon season means staying indoors. For a travel photographer, it means the light show is about to begin.
Asia’s monsoon season transforms ordinary landscapes into dramatic, moody masterpieces. The rain scrubs the air clean, leaving behind crystal clarity and deep, saturated colors. Storm clouds act like giant softboxes, diffusing light into a soft glow one moment and creating shafts of golden sun the next. If you have only photographed Asia during the dry season, you have been missing half the story.
Monsoon photography techniques rely on reading weather patterns, protecting your gear, and embracing high dynamic range scenes. This guide covers seven essential methods to capture dramatic storm light, reflections, rain streaks, and moody atmospheres across Asia. You will learn camera settings, composition tips, and safety practices for shooting in wet conditions.
Reading the Sky Before the Storm
Monsoon light changes by the minute. You cannot rely on golden hour apps alone. The best monsoon photography techniques start with weather literacy. Learn to read cumulonimbus clouds. When you see tall, anvil shaped clouds building on the horizon, that is your signal to get into position.
Check satellite radar apps before heading out. Look for gaps in the cloud cover. The most dramatic light happens when the sun breaks through a thin patch of cloud just before or after a heavy downpour. That sliver of direct sunlight cutting through the rain creates shafts of light called crepuscular rays. They are pure magic for landscape shots.
Timing matters more than location. A mediocre foreground can become extraordinary under the right storm light. Stay flexible with your plans. If you see a promising weather window forming over a rice terrace or a temple complex, move toward it.
Protecting Your Gear in Wet Conditions
You cannot capture monsoon photography techniques in action if your camera is dead. Water damage is the number one killer of gear during the rainy season. But you do not need a full underwater housing for most situations.
Here is a simple process for staying dry:
- Keep a microfiber cloth inside a ziplock bag in your pocket. Wipe the camera body between shots.
- Use a rain sleeve or a simple plastic bag with a hole cut for the lens. Secure it with a rubber band around the lens hood.
- Carry silica gel packs in your camera bag. Swap them out when they get saturated.
- Let your gear acclimate slowly when moving from air conditioning to humid outdoor air. Keep the camera in the bag for 15 minutes to avoid internal condensation.
- Use a lens hood as a mini umbrella. It keeps raindrops off the front element.
Do not be afraid of light drizzle. Many of the best shots come during or right after a shower. Just be disciplined about drying everything thoroughly at the end of the day.
Using Slow Shutter Speeds for Rain and Movement
Rain looks like streaks when you use a slow shutter speed. It adds energy and texture to your photos. Set your shutter speed between 1/15th of a second and 1 second, depending on how fast the rain is falling. The slower the shutter, the longer the streaks.
Use a tripod for anything slower than 1/60th of a second. Monsoon light is often dim, so your ISO will need to rise. Start at ISO 400 and go up to ISO 1600 if needed. Modern cameras handle noise well, and a little grain adds mood to storm scenes.
For rain to show up clearly, you need a dark background. Frame your shot so the rain falls against shadowed trees, dark mountains, or a stormy sky. Rain against a bright overcast sky disappears. If you are shooting in Thailand’s Chiang Mai during the monsoon, position yourself so the rain streaks show against the dark green jungle hills.
Aperture priority mode works well here. Set your aperture to f/8 or f/11 for good depth of field, then let the camera choose the shutter speed. Dial in exposure compensation to underexpose by one stop. This protects your highlights and deepens the mood.
Capturing Reflections After the Rain
Monsoon season turns streets, rice paddies, and temple courtyards into mirrors. Puddles are your best friend. They reflect the sky and create symmetry in your compositions.
Look for shallow water on flat surfaces. Cobblestone streets in Hoi An, Vietnam become liquid gold after a rain shower. The wet stone reflects the colorful lanterns and shop lights. Get low to the ground. Place your camera just inches above the water level to maximize the reflection.
Use a polarizing filter with caution. A polarizer can cut reflections, which is the opposite of what you want here. Instead, remove the polarizer and let the water shine. If the sky is dramatic, include two thirds reflection and one third sky for a balanced composition.
For a creative twist, use a slow shutter to blur people walking through the puddles. The contrast between the sharp reflection and the blurred movement tells a story of daily life continuing through the rain. This works beautifully in busy markets or temple entrances.
Working with High Contrast Monsoon Light
Monsoon light creates extreme dynamic range. The sky can be bright white while the ground is deep shadow. Your camera cannot capture both in one shot without help.
Use exposure bracketing. Set your camera to shoot three frames: one at the metered exposure, one underexposed by two stops, and one overexposed by two stops. Blend them later in post processing for a balanced image. This is one of the most important monsoon photography techniques for landscape work.
Graduated neutral density filters are another option. A two stop soft grad helps tame the bright sky while keeping the foreground natural. Carry a set of GND filters in your bag for sunrise and sunset shoots during the monsoon.
If you prefer to work in single exposures, expose for the highlights. Let the shadows go dark. A silhouette of a fisherman on Tonle Sap Lake against a stormy sky is far more dramatic than a flat, evenly exposed shot. Underexposure adds mystery.
Composing with Storm Clouds as the Main Element
Storm clouds are the star of monsoon photography. Treat them as your primary subject, not just background filler. Compose so the clouds dominate the frame.
Wide angle lenses work well for capturing the scale of storm systems. A 16-35mm lens lets you include both the massive cloud formation and a strong foreground element. Place the horizon low in the frame, around the bottom third, to emphasize the sky.
Look for leading lines that draw the eye into the clouds. A winding river, a row of palm trees, or a curved beach can guide the viewer’s gaze upward. The clouds themselves often have leading lines in the form of rain shafts or light beams.
Black and white conversion works exceptionally well for storm clouds. The contrast between white cloud tops and dark rain curtains becomes even more striking without color. Try converting a few frames in post processing to see if the mood strengthens.
Staying Safe While Chasing Storms
Safety comes first. Monsoon storms bring lightning, flash floods, and slippery conditions. Do not risk your life for a photo.
Follow these safety rules:
- Never stand under a lone tree during a lightning storm. Move away from open fields and high points.
- Avoid riverbeds and dry creek beds. Flash floods can appear with no warning.
- Wear non slip shoes. Wet rocks and temple steps become dangerously slick.
- Keep a headlamp in your bag. Afternoon storms often roll in and turn day into dusk.
- Tell someone where you are shooting. Cell service can be spotty in rural areas.
If you hear thunder, count the seconds between the flash and the sound. Five seconds means the lightning is about one mile away. Take cover immediately. A car or a building with plumbing and wiring is safer than a small hut or a tent.
Putting the Techniques Together in the Field
Here is a table that summarizes the key monsoon photography techniques and common mistakes to avoid.
| Technique | How to Apply | Common Mistake |
|---|---|---|
| Slow shutter for rain | Use 1/15s to 1s shutter, dark background | Shooting rain against bright sky |
| Reflection capture | Get low, remove polarizer, use puddles | Using polarizer and killing reflection |
| High contrast handling | Bracket exposures or use GND filters | Exposing for shadows, blowing out sky |
| Storm cloud composition | Use wide lens, low horizon, leading lines | Centering horizon, ignoring foreground |
| Gear protection | Rain sleeve, lens hood, silica gel | Leaving camera exposed between shots |
| Weather reading | Use radar apps, watch cloud shapes | Relying only on golden hour apps |
| Safety planning | Avoid open areas during lightning, wear grippy shoes | Ignoring flash flood risks in riverbeds |
A Field Workflow for Monsoon Photography
When you arrive at a location during monsoon season, follow this order:
First, assess the sky. Is the storm building or passing? If it is building, set up your tripod and prepare for dramatic light. If it is passing, wait for the clearing light that often follows.
Second, check your camera settings. Start with aperture priority at f/8, ISO 400, and spot metering. Adjust as the light changes.
Third, compose with the clouds as the anchor. Find a strong foreground element. A person, a boat, a tree, or a building adds scale.
Fourth, shoot a bracket of three exposures. Even if you do not blend them later, having the extra frames gives you options.
Fifth, review your histogram. Monsoon scenes often have a spike on the left (shadows) and a gap on the right (highlights). That is normal. Push the exposure to the right without clipping the highlights.
Sixth, protect your gear between shots. Wipe the camera, check the lens for water spots, and keep the bag zipped.
Seventh, stay patient. Monsoon weather cycles fast. A disappointing gray sky can turn into a golden explosion in five minutes. Wait it out.
“The best monsoon shots I have ever taken came after I was soaked, cold, and ready to pack up. The light broke through for exactly three minutes. Those three minutes made the whole trip worth it.” – Veteran travel photographer based in Bangkok
Making the Most of Post Processing
Monsoon images benefit from careful editing. The goal is to enhance the mood, not to fight it.
Start with the white balance. Monsoon light is often cool and blue. That is fine. Do not warm it up to look like golden hour. Embrace the cool tones. If you want a warmer feel, shift slightly toward 5500K, but do not go full sunset orange.
Increase contrast to make the clouds pop. Use the tone curve to add an S shape. Lift the shadows slightly to reveal detail in the dark areas, but keep them moody. Crush the blacks a little for a film like look.
Use the dehaze slider in Lightroom with a light hand. Too much dehaze creates an artificial, over processed look. A small amount, around 10 to 20, cuts through the atmospheric moisture without ruining the natural feel.
If you shot bracketed exposures, merge them in Lightroom or Photoshop. Use the HDR merge tool for natural looking results. Avoid the overdone HDR look with halos and unnatural colors. The goal is a scene that looks like what your eye saw, not a video game.
For black and white conversions, use the black and white mix panel. Darken the blues to make the storm clouds more dramatic. Lighten the yellows and oranges if there are warm elements in the frame. This creates separation between the sky and the foreground.
Choosing the Right Locations for Monsoon Shots
Some locations in Asia are built for monsoon photography. The rain enhances them.
Rice terraces in Bali, the Philippines, and northern Vietnam become liquid mirrors. The flooded paddies reflect the storm sky perfectly. Head to Tegallalang or Jatiluwih in Bali during the wet season for layered reflections.
Thailand’s floating markets near Bangkok get a moody atmosphere during the rains. The wooden boats and fruit vendors look cinematic against the gray sky. Shoot from a low angle to include the reflections in the water.
Angkor Wat in Cambodia during the monsoon is spectacular. The moats fill up and create perfect reflections of the temple spires. Storm clouds gathering behind the main temple make for iconic images.
Ha Long Bay in Vietnam is moody and mysterious in the rain. The limestone karsts disappear into low cloud and reappear in shafts of light. Take a overnight cruise and shoot from the deck early in the morning.
If you are planning a trip around monsoon photography, check out our guide to mastering the art of golden hour landscape photography in Asia for complementary techniques that work in any season.
Embracing the Unpredictable
Monsoon photography is not about perfect conditions. It is about working with what the sky gives you. Some days you will get dramatic storm light and golden beams. Other days you will get flat gray and steady rain. Both have their own beauty.
The flat gray days are perfect for intimate landscapes. Focus on details: water dripping from a leaf, a child’s umbrella against a wet street, steam rising from a food stall. These small moments tell the human side of the monsoon story.
The dramatic days are for grand landscapes. Wide shots of storm clouds over mountains, lightning bolts over the ocean, and rain curtains sweeping across rice fields. These images have power and scale.
Both are valid. Both are worth capturing. The key is to show up, stay safe, and keep your camera ready.
Your Next Step for Monsoon Photography
You now have seven essential monsoon photography techniques to work with. The next step is practice. Pick one technique from this guide and focus on it during your next rainy day shoot. Try slow shutter rain streaks. Or find a puddle and work on reflections. Master one technique before moving to the next.
Pack your gear, check the weather radar, and head out when the clouds build. The monsoon waits for no one. Neither should you.