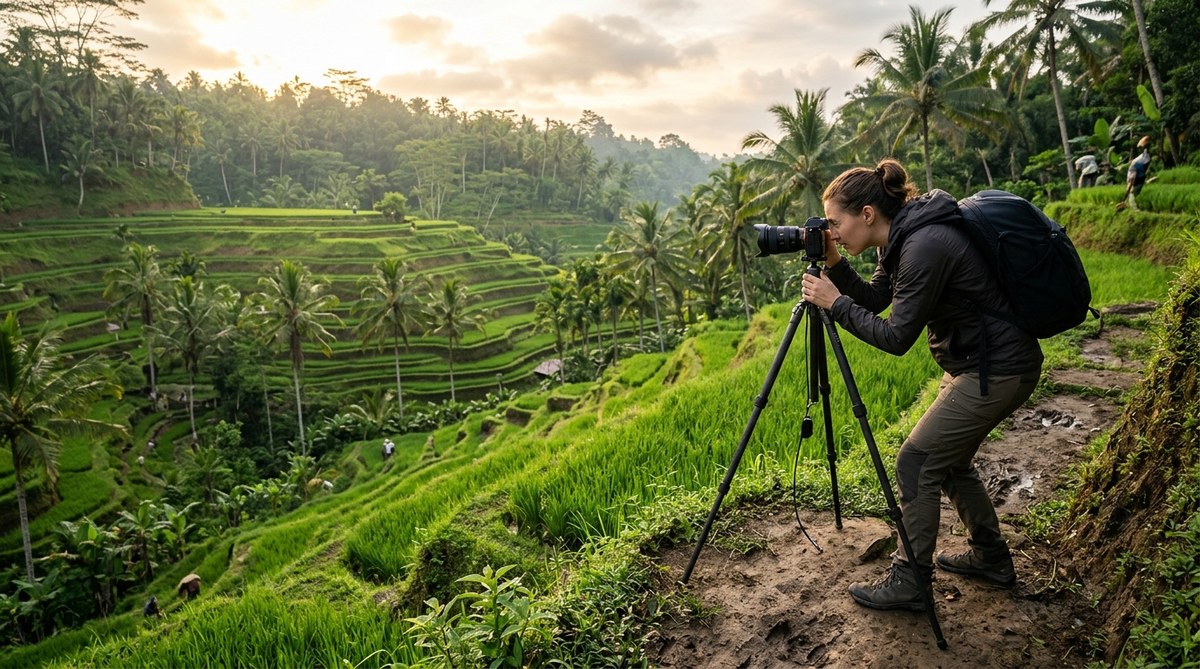
The emerald staircases of Bali’s rice terraces are one of the most photographed landscapes on the planet. You have seen the postcards, the Instagram reels, and the drone shots that make Tegallalang look like a green ocean. But when you stand at the edge of those terraces with your camera, the real challenge begins. The light is harsh. The crowds are thick. And the scene is so wide that your photos can end up looking flat. I have been there, and I have made those mistakes. This guide is built to help you avoid them. It focuses on practical, step-by-step advice so you can return home with images that match the magic you felt in the moment.
To capture the emerald rice terraces of Bali at their finest, you need to plan around the growing cycle, the weather, and the sun. This guide covers the three best locations, the exact times to shoot, and the camera settings that will turn a crowded tourist spot into a serene landscape masterpiece. Bring a polarizer and patience.
The Three Best Locations for Rice Terrace Photography
Not all rice terraces in Bali are created equal. Each location offers a different angle, a different crowd level, and a different photographic challenge. Here is a breakdown of the top three spots you should consider for your 2026 trip.
Tegallalang Rice Terraces
This is the most famous spot, and for good reason. The terraces curve in dramatic, sweeping lines that look incredible from a wide angle. It is about a 30-minute drive north of Ubud. The downside is the crowds. By 9:00 AM, the pathways are packed with tourists, and the local swing operators are playing pop music. Your window for a clean shot is narrow.
- Best for: Wide-angle landscapes and leading lines.
- Best time: Sunrise, before the tour buses arrive.
- Entry fee: Around 50,000 IDR (about $3 USD).
Jatiluwih Rice Terraces
If you want scale, go to Jatiluwih. This UNESCO World Heritage site is much larger than Tegallalang and spreads across the foothills of Mount Batukaru. The terraces here are less manicured, which gives them a more natural, wild feel. The light in the late afternoon is spectacular because the mountains create a soft, diffused glow.
- Best for: Vast panoramic shots and misty morning scenes.
- Best time: Late afternoon for golden hour.
- Entry fee: Around 40,000 IDR.
Sidemen Rice Terraces
Sidemen is the quiet cousin. Located east of Ubud, it receives far fewer visitors. The terraces here are smaller and steeper, with Mount Agung looming in the background. This is the spot for intimate portraits of farmers at work and for capturing the human element of the landscape.
- Best for: Environmental portraits and detail shots.
- Best time: Early morning for soft light and local activity.
- Entry fee: Free or a small donation.
Timing Your Shoot Around the Rice Cycle
The color of the terraces changes throughout the year. If you show up during the dry season when the fields are bare, you will be photographing brown mud. The magic happens when the rice is young and bright green. That stage lasts for about six to eight weeks after planting.
Here is a simple guide to the growing cycle:
| Stage | Color | Best for Photography |
|---|---|---|
| Planting (Jan-Feb, Jun-Jul) | Muddy brown with green sprouts | Textures and patterns |
| Growing (Mar-Apr, Aug-Sep) | Bright emerald green | Vibrant landscape shots |
| Harvesting (May, Oct) | Golden yellow | Warm, earthy tones |
| Fallow (Nov-Dec, Jun) | Dry brown | Minimalist compositions |
For the most vibrant emerald tones, plan your trip for March, April, August, or September. These months also fall within the dry season, which means clearer skies and better light.
Step-by-Step: How to Shoot the Terraces
Let us walk through the process from arrival to final shot. This is a numbered list of practical steps.
-
Arrive at least 30 minutes before sunrise. This gives you time to find your composition and set up your tripod before the light changes. The first light hitting the terraces is soft and warm, and it creates long shadows that emphasize the curves.
-
Find a high vantage point. Walk up to one of the cafes that overlook the terraces and ask permission to shoot from their balcony. A higher angle compresses the layers of the terraces, making the scene look more three-dimensional.
-
Use a polarizing filter. The tropical sun creates a lot of glare on the waterlogged fields. A circular polarizer cuts through that glare and saturates the greens. It is the single most important filter for this location.
-
Shoot in aperture priority mode. Set your aperture to f/8 or f/11 to keep the entire scene sharp from the foreground to the distant hills. Let the camera handle the shutter speed. Use ISO 100 to keep noise low.
-
Wait for a person to walk through the frame. A farmer in a conical hat or a local carrying a basket gives the image a sense of scale. Be patient. The right person will appear.
Common Mistakes and How to Fix Them
I have seen photographers make the same errors over and over at the terraces. Here is a table that breaks down the most common mistakes and the simple fixes.
| Mistake | Why It Happens | The Fix |
|---|---|---|
| Overexposed highlights | The bright sky tricks the meter | Use exposure compensation at -0.7 or -1.0 |
| Flat colors | Harsh midday sun | Shoot during golden hour or use a polarizer |
| Distracting elements | Tourists, garbage, signs | Wait for a clear moment or clone them out in post |
| No depth in the image | Shooting from ground level | Find a higher vantage point or use a longer lens |
| Blurry images | Slow shutter speed in low light | Use a tripod or increase ISO to 400 |
Expert advice: “Do not be afraid of a little fog or mist. It adds atmosphere and separates the layers of the terraces. Some of my best shots from Bali were taken when the valley was half covered in morning mist.” – A professional landscape photographer who shoots in Asia regularly.
Gear Recommendations for 2026
You do not need a bag full of expensive lenses to get great shots here. But a few specific pieces of gear will make your life easier.
- A wide-angle zoom lens (16-35mm or 14-24mm) to capture the sweeping curves.
- A telephoto lens (70-200mm) for compressing distant layers and isolating details.
- A sturdy tripod for early morning long exposures.
- A circular polarizing filter to cut glare and boost color.
- A rain cover for your camera. The humidity and sudden tropical showers are real.
If you are still deciding on what to pack, take a look at our guide on choosing the perfect camera gear for capturing Asia’s stunning landscapes. It covers everything from tripods to filter systems.
How to Handle the Crowds
Bali is busy. The rice terraces are busy. You cannot avoid people entirely, but you can work around them.
- Shoot during the week. Weekends are packed with local tourists from other parts of Indonesia.
- Walk further into the terraces. Most tourists stay within the first 100 meters. If you walk for 15 minutes, you will find empty pathways.
- Use a long exposure. If people are walking through your frame, set your shutter speed to 2 seconds or longer. They will blur into ghostly figures or disappear entirely.
For more on working with difficult light and crowds, check out our article on mastering the art of golden hour landscape photography in Asia. It has tips that apply directly to locations like these.
Editing Your Terrace Photos
The raw files from Bali will look a little flat. That is normal. The humidity and haze reduce contrast. Your goal in post-processing should be to bring back the depth.
- Increase contrast slightly to separate the layers.
- Boost the greens and yellows selectively. Do not touch the blues too much, or the sky will look unnatural.
- Use a graduated filter in Lightroom to darken the sky if it is overexposed.
- Add a small amount of clarity to bring out the texture of the rice stalks.
For a deeper look at editing workflows for this region, read our guide on mastering Asian landscape photography edits for stunning results.
The One Shot You Should Not Miss
If you only have time for one composition, make it this one. Find a spot where the terraces curve in an S-shape through the valley. Place a single palm tree or a farmer on the left third of the frame. Use a wide focal length (around 20mm) and set your aperture to f/11. Wait for the sun to break over the eastern ridge. The light will hit the top terraces first, leaving the lower ones in shadow. That contrast is pure magic.
Making the Most of Your Trip in 2026
Bali in 2026 will be different from previous years. The tourism industry has shifted toward more sustainable practices, and the rice terraces are seeing better management of visitor numbers. Some locations now require a digital ticket purchased in advance. Check the official websites for Tegallalang and Jatiluwih before you go.
Also, be respectful of the farmers. They are working, not performing. If you want a portrait, ask permission first. A smile and a nod go a long way. And do not walk on the young rice plants. Stick to the narrow dirt paths that separate the fields.
Your Best Tool Is Patience
The rice terraces of Bali are not a secret. Thousands of photographers have stood where you will stand. The difference between a good photo and a great one often comes down to waiting. Wait for the right light. Wait for the right moment. Wait for the crowd to move. The terraces reward those who take their time.
Pack your gear, set your alarm for 4:30 AM, and get out there. The emerald green is waiting for you.