Winter in Kyoto carries a special stillness. The crowds thin, the air turns crisp, and the famous moss gardens transform into something almost otherworldly. If you want to photograph Kyoto moss gardens winter is actually the best kept secret among landscape photographers who know the value of soft light, bare branches, and dew covered carpets of green.
Saihoji, better known as Kokedera or the Moss Temple, sits at the heart of this experience. Over 120 varieties of moss spread across its garden like a living tapestry. In winter, when deciduous trees lose their leaves, the moss becomes the star. Low angle sunlight filters through the remaining evergreens, creating a glow that feels sacred. This guide walks you through exactly how to plan, shoot, and edit your winter moss photography so you return home with images that do justice to the silence.
To photograph Kyoto moss gardens in winter, visit Saihoji between late January and early February for soft light and minimal foliage distraction. Book your reservation two months ahead by mail or online. Use a polarizing filter to cut glare on wet moss, and shoot in the hour after sunrise when dew still clings to the surface. A sturdy tripod is essential for low light conditions.
## Why Winter Transforms Kyoto’s Moss Gardens
Most visitors think of Kyoto in spring for cherry blossoms or autumn for maple colors. Winter moss photography offers something different. The garden enters a quiet phase. Without bright flowers or dense leaf cover, your eye goes straight to the ground. Moss becomes the main subject.
Winter light in Kyoto is soft and diffused. The sun stays low in the sky, which means longer shadows and a gentle quality that flatters textured surfaces. Morning fog often lingers near the ground, adding depth and mystery. Rain and dew keep the moss hydrated, making its colors richer than in dry summer months.
Another advantage is the lack of crowds. Saihoji limits visitors year round, but winter sees the fewest applications. You have a better chance of securing a spot and enjoying a peaceful experience. The combination of reduced foot traffic and subdued light makes winter the ideal season for contemplative photography.
## Planning Your Visit to Saihoji and Beyond
Getting into Saihoji requires advance planning. The temple accepts a limited number of visitors each day. Follow this step by step process to secure your reservation.
1. Go to the official Saihoji website and check the reservation calendar. Visits are scheduled in time slots, usually starting at 10:00 AM and 1:00 PM.
2. Submit your application by postal mail at least two months before your desired date. Include a return envelope with your address and a postal money order for the entrance fee, which is about 4,000 yen.
3. Wait for your confirmation postcard, which will arrive a few weeks later. Bring this postcard with you on the day of your visit.
4. Arrive 15 minutes early. You will first copy a sutra in the temple hall before entering the garden. This ritual takes about 30 minutes.
5. Once inside the garden, you can photograph freely but must stay on the designated path. No tripods are allowed in certain areas, so check the rules on arrival.
For additional moss garden photography, consider Gioji in Arashiyama. This smaller temple requires no reservation and features a dense carpet of moss beneath bamboo and maple trees. Honenin is another excellent choice, with a quiet garden open to the public for free. Both locations offer variety if you want to expand your portfolio beyond Saihoji.
If you are planning a broader winter photography trip across Japan, our guide to [choosing the perfect camera gear for capturing Asia’s stunning landscapes](https://naturesbestphotography.asia/choosing-the-perfect-camera-gear-for-capturing-asia-s-stunning-landscapes/) will help you pack smart without overloading your bag.
## Essential Gear for Winter Moss Photography
Moss photography demands attention to detail. The textures are fine, the light is low, and the environment can be damp. Pack these items for best results.
– A sturdy tripod. Winter light means longer exposures. A carbon fiber tripod is light enough to carry all day and resists cold induced stiffness.
– A polarizing filter. Wet moss reflects light in ways that wash out color. A circular polarizer cuts glare and deepens the green tones.
– A macro lens or a lens with close focusing ability. Moss looks best when you capture its tiny fronds and water droplets. A 90mm or 100mm macro gives you working distance without disturbing the garden.
– A wide angle lens for context shots. Use a 16-35mm or similar to show the scale of the garden and how moss flows over rocks, trees, and earth.
– A rain cover for your camera. Winter in Kyoto brings occasional showers. A simple plastic cover protects your gear while you shoot.
– Spare batteries. Cold weather drains battery life faster. Keep a second set warm in an inside pocket.
– Lens cleaning cloth. Moisture can fog your front element. A microfiber cloth helps you maintain clarity.
For those interested in capturing the interplay of light and shadow in other challenging environments, the techniques covered in [mastering low light photography techniques in Asian landscapes](https://naturesbestphotography.asia/mastering-low-light-photography-techniques-in-asian-landscapes/) will directly apply to your moss garden work.
## Camera Settings and Techniques
The key to photographing moss in winter lies in controlling exposure and depth of field. Moss textures demand sharp focus, while the soft light requires careful metering. Use the table below as a reference for common scenarios and how to handle them.
| Scenario | Problem | Solution |
|———-|———|———-|
| Deep shade under trees | Moss appears dark and flat | Bracket exposures 1 stop apart, merge in post processing |
| Wet moss after rain | Glare hides texture detail | Attach a polarizing filter, rotate until glare diminishes |
| Low contrast overcast day | Image looks muddy | Add 0.3 to 0.7 exposure compensation, boost clarity in edit |
| Wind moving moss fronds | Blurry macro shots | Increase ISO to 800 or 1600, use a shutter speed of 1/125 or faster |
| Tripod not allowed in some zones | Camera shake risk | Use a wide aperture (f/2.8 to f/4) and lean against a stable surface |
For most wide angle moss landscapes, aim for an aperture between f/8 and f/11 to keep the foreground and background sharp. Focus about one third into the scene for maximum depth of field. In macro work, use f/5.6 to f/8 to isolate a small patch of moss while maintaining enough detail.
Metering can be tricky because moss is a mid tone subject but often appears in shadow. Switch to spot metering and take a reading from the moss itself. Adjust exposure compensation to keep the greens rich without blowing out highlights on rocks or tree trunks.
## Composition Secrets for Moss Landscapes
Moss gardens reward patience. Walk the path once without your camera. Notice where the light falls, how the moss curves around stones, and where water collects. Then return to those spots with intention.
Look for leading lines. Moss often grows along the edges of paths, streams, or stone borders. Use these lines to draw the viewer’s eye deeper into the frame. A winding trail of moss covered earth can guide the gaze from the foreground to a distant tree or temple structure.
Include context elements. A single patch of moss is interesting, but placing it near a weathered lantern, a bare branch, or a fallen camellia petal adds storytelling. Winter brings fallen camellia flowers in shades of pink and red, which contrast beautifully against green moss.
Frame with negative space. Bare winter branches create natural frames around your subject. Position yourself so that a curved branch arcs over a moss covered area. The negative space of the sky or a plain wall helps the moss stand out.
Get low. The most compelling moss photos are taken from ground level. Kneel down and place your camera near the moss itself. This angle emphasizes texture and makes the moss feel monumental.
For more ideas on composing natural scenes with strong emotional impact, read our article on [enhancing your Asian landscape photography with innovative techniques for stunning results](https://naturesbestphotography.asia/enhance-your-asian-landscape-photography-with-innovative-techniques-for-stunning-results/).
## Working with Winter Light
Winter light in Kyoto follows a predictable rhythm that works in your favor. The golden hour lasts longer than in summer because the sun stays lower. You get soft, warm light for a solid hour after sunrise and again before sunset.
Morning is the best time for moss photography. The garden opens at 10:00 AM, which means you miss the earliest light. But in winter, the sun remains low enough until about 11:30 AM to give you good quality. Dew and frost often cling to the moss until mid morning, adding sparkle and detail.
Overcast days are your friend. Diffused light eliminates harsh shadows and lets the moss glow evenly. If you wake up to gray skies, celebrate. That is the perfect condition for photographing the subtle variations of green.
Rain adds a different mood. A light shower brings out the deepest colors in moss. After the rain stops, the air clears and droplets cling to every surface. These conditions make the garden feel alive and intimate. Keep your gear protected and shoot through the rain for unique results.
For photographers who want to master the art of working with natural light across Asia, our guide on [mastering the art of golden hour landscape photography in Asia](https://naturesbestphotography.asia/mastering-the-art-of-golden-hour-landscape-photography-in-asia/) provides deeper techniques that apply directly to your moss garden work.
## Post Processing Tips for Moss Photos
The goal in editing winter moss photos is to enhance the natural beauty without making it look artificial. Start by adjusting the white balance. Moss can lean too yellow or too blue depending on the light. Aim for a neutral green that matches what you saw in the garden.
Increase contrast slightly to bring out texture. Use the clarity slider in moderation, around +10 to +20, to define the tiny fronds without creating halos. Adding a small amount of dehaze can cut through any remaining atmospheric fog.
Work on the greens selectively. Use a hue saturation luminance panel to shift the green hue slightly toward yellow or blue depending on the mood you want. A slight shift toward yellow feels warm and inviting. A shift toward blue feels cool and serene. Saturation should stay moderate. Too much saturation makes the moss look fake.
Sharpen with a mask. Moss has fine detail that benefits from sharpening, but you do not want to sharpen the background. Use a layer mask or a brush to apply sharpening only to the moss areas.
Crop with intention. Winter moss gardens have a minimalist quality. Crop out distractions like other visitors, signage, or modern buildings. If your composition includes a path or stream, make sure it leads naturally through the frame.
> **Expert Tip from a longtime Kyoto photographer:** “Do not rush to edit your moss photos right away. Let the memory of the garden settle for a day or two. Then look at your images with fresh eyes. The best edits come from remembering how the garden felt, not just how it looked. Focus on recreating the quiet, not just the color.”
## Navigating Temple Etiquette and Restrictions
Photographing in a sacred space requires respect. Saihoji and other temples are active places of worship. Follow these guidelines to ensure a positive experience for everyone.
Stay on the designated path at all times. Moss is fragile and takes years to recover from footprints. Do not step off the walkways even for a better angle. Use a telephoto lens if you need to reach a distant composition.
Do not use flash. It disturbs other visitors and can damage the contemplative atmosphere. Winter light is soft enough that you rarely need flash anyway.
Keep your voice low. The garden is meant for quiet reflection. Let the sounds of water and birds be the background noise.
Be mindful of other photographers. If someone is setting up a shot, wait your turn. Offer a friendly nod and move on. The garden is small, and patience goes a long way.
If you plan to photograph at multiple temples, our article on [top composition strategies for capturing authentic Asian cultural scenes](https://naturesbestphotography.asia/top-composition-strategies-for-capturing-authentic-asian-cultural-scenes/) offers frameworks that respect local customs while producing strong images.
## The Unique Magic of Each Moss Garden
Saihoji is the crown jewel, but each garden offers something different for winter moss photography.
Gioji sits in Arashiyama and feels intimate. The moss grows thick under a canopy of maple and bamboo. In winter, the bare maples let more light reach the ground, so the moss glows warmly. The garden is small, which forces you to focus on details rather than wide landscapes.
Honenin is less visited and free to enter. Its moss garden blends with forest and stream. You can find compositions that include water reflections alongside moss covered banks. The quiet here is profound.
Kodaiji features a modern moss garden designed by a contemporary artist. The patterns are more geometric than natural. Winter light enhances the contrast between moss and stone pathways.
Each location rewards a different approach. At Gioji, go macro. At Honenin, go wide. At Kodaiji, look for symmetry and line.
If you enjoy photographing the quiet corners of Japan, our guide on [how to photograph the enchanting bamboo forests of Japan](https://naturesbestphotography.asia/how-to-photograph-the-enchanting-bamboo-forests-of-japan/) pairs well with a moss garden trip. Both subjects reward patience and a soft touch.
## A Personal Walk Through Saihoji in Winter
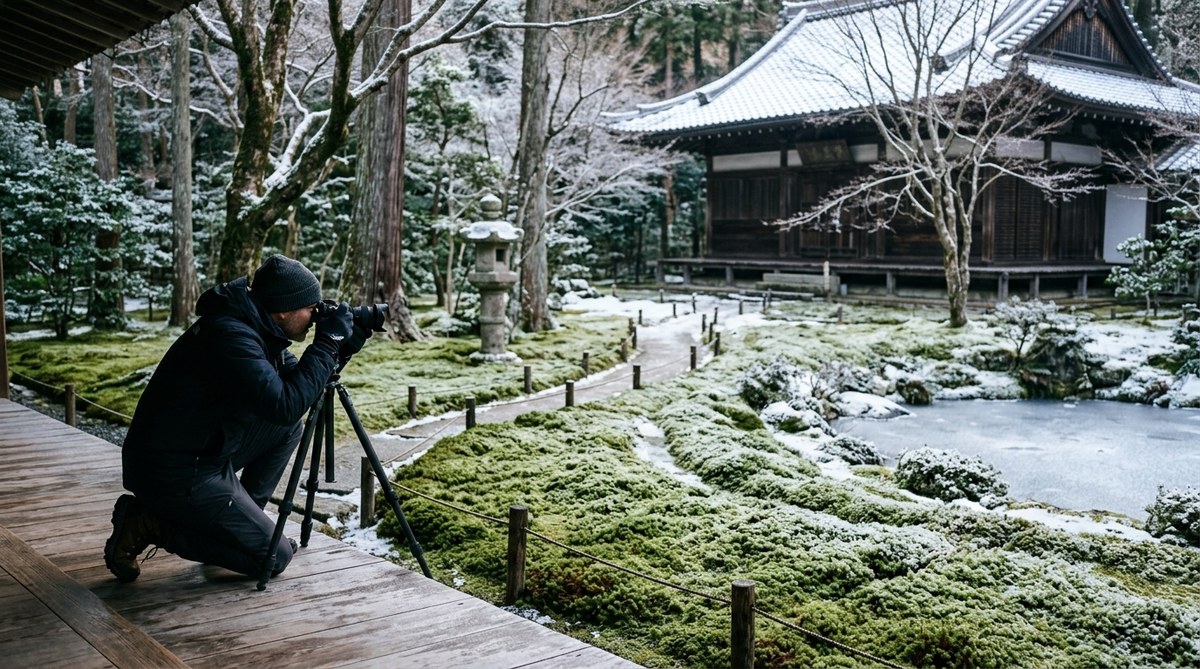
Picture this. You arrive at Saihoji on a Tuesday morning in late January. The air is cold enough to see your breath. A light frost covers the ground. You show your reservation postcard and join a small group of six people. After copying the sutra, you step into the garden.
The path winds around a central pond. Moss covers everything. The banks, the tree roots, the base of stone lanterns. In the winter light, the moss looks almost blue green in the shadows and yellow green where the sun touches it. You set up your tripod near a cluster of moss covered rocks. The water in the pond is still, reflecting bare branches above.
You take your time. You shoot a wide angle of the pond with moss in the foreground. Then you switch to your macro lens and get close to a patch where tiny droplets catch the light. An hour passes like ten minutes.
When you leave, you feel calm. The photos you captured are not just records of a place. They hold the feeling of that winter morning.
## Bringing the Moss Garden Home
Editing your photos later, you will remember the cold on your fingers and the sound of water dripping from a bamboo spout. That memory is what makes your images authentic. Technical skill matters, but the emotion of the place is what connects with viewers.
Share your work with the photography community. Post your best shots, describe your process, and inspire others to discover winter moss gardens. The more photographers appreciate these spaces, the more they will be protected for future generations.
Your winter trip to Kyoto can be one of the most rewarding photography experiences you will have. The combination of soft light, rich texture, and deep quiet is hard to find anywhere else. Plan ahead, pack thoughtfully, and let the garden guide your eye.
For a complete overview of camera systems that handle winter conditions well, check our guide on [choosing the perfect camera gear for capturing Asia’s stunning landscapes](https://naturesbestphotography.asia/choosing-the-perfect-camera-gear-for-capturing-asia-s-stunning-landscapes/). It covers everything from weather sealing to lens selection for cold weather shooting.
Now go book that reservation. The moss is waiting.