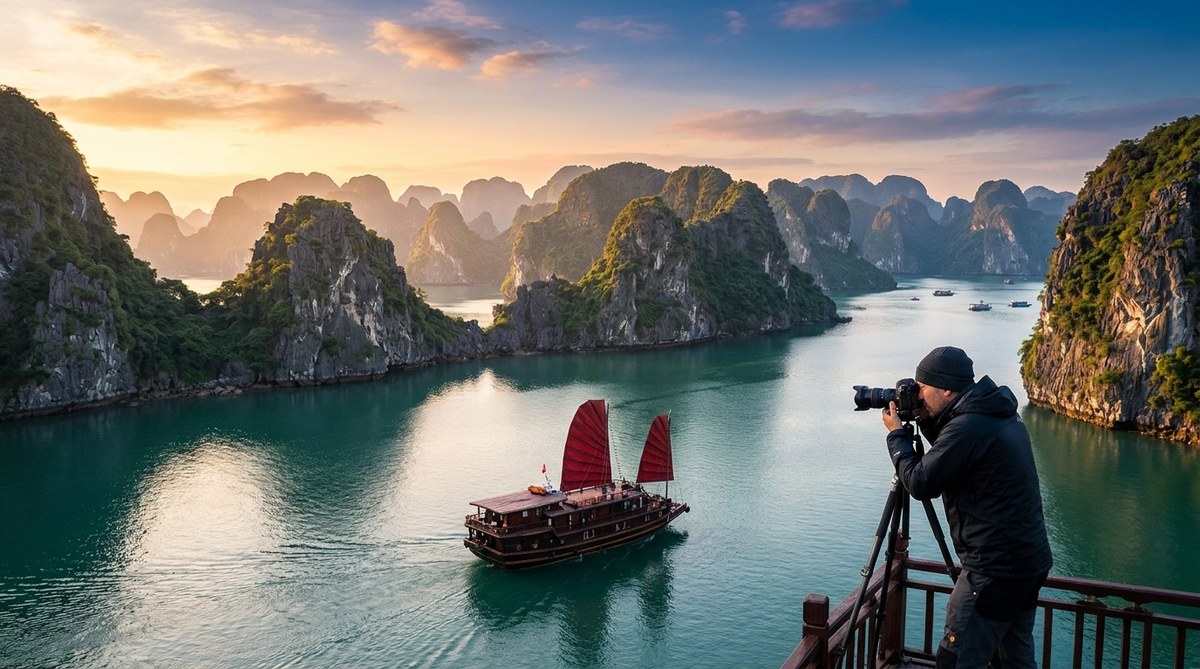
You are standing on the deck of a traditional junk boat. The engine cuts out. Silence settles around you. Then you hear it: the soft lap of emerald water against limestone that has stood here for millions of years. The karsts of Ha Long Bay rise like ancient sentinels, their jagged peaks cutting through a veil of morning mist. For a travel photographer, this is hallowed ground. But capturing that sense of awe in a single frame takes more than luck. It takes planning, technique, and a deep understanding of how light behaves in this unique seascape. The following Ha Long Bay photography tips will help you return home with images that do justice to one of Vietnam’s most iconic landscapes.
Great Ha Long Bay photos depend on three pillars: timing your visit during the dry season (October to April), using a telephoto lens to compress the layered karsts, and waking up for the 15-minute window of golden mist that happens just after sunrise. Master these, and your portfolio will stand out.
The Best Season for Dramatic Light
Ha Long Bay has two main seasons. The dry winter months from October to April bring cooler air, lower humidity, and frequent morning fog. This is the prime window for atmospheric shots. The mist hangs between the karsts like a soft veil, creating depth and mystery. Summer (May to September) offers intense heat, afternoon thunderstorms, and higher humidity. The light is harsher, but the storms can produce dramatic cloud formations and rain shafts that add mood.
For the most consistent results, plan your trip between November and February. The temperature hovers around 60 to 70 degrees Fahrenheit. Pack a light jacket for early mornings on the water. The mist is thickest between 5:30 AM and 7:00 AM. That is your golden window.
7 Pro Techniques for Photographing Ha Long Bay
Here is a step-by-step workflow to follow once you are on the water.
-
Wake up early. Set your alarm for 4:45 AM. The ferry or junk boat will be stationary overnight. Use that time to scout your foreground. Look for a floating fishing boat, a lone tree on a small islet, or a row of anchored vessels.
-
Mount your camera on a tripod. The low light at dawn requires steady hands. A tripod also lets you use a small aperture (f/11 to f/16) to keep the entire scene sharp from the nearest rock to the farthest karst.
-
Set your white balance to “Cloudy.” This warms up the blue tones in the mist and gives the limestone a golden hue. You can fine-tune it later, but starting warmer saves time.
-
Use spot metering. The mist can fool your camera’s evaluative meter. Point the spot meter at a mid-tone area of the sky or the water, lock exposure, and recompose.
-
Focus one-third into the frame. Use a single autofocus point on a karst edge. This maximizes depth of field when combined with your small aperture.
-
Bracket your exposures. Shoot three frames at -1, 0, and +1 EV. The mist can blow out highlights fast. Bracketing gives you a safety net for blending later.
-
Review and adjust. After the first few shots, zoom in on the LCD. Check for sharpness in the foreground and the distant peaks. If the mist looks too flat, increase contrast by one stop in your camera’s picture style settings.
The Gear That Works Best
You do not need a truckload of equipment, but the right choices matter. Here is a breakdown of what to bring and what to leave behind.
| Gear Item | Recommended | Why It Helps |
|---|---|---|
| Lens | 70-200mm f/2.8 or f/4 | Compresses the layered karsts into a dramatic stack. |
| Lens | 16-35mm f/4 | Captures the full scale of the bay from a low angle. |
| Tripod | Carbon fiber travel tripod | Lightweight and stable on a moving boat deck. |
| Filters | Circular polarizer | Cuts glare on the water and saturates the green tones. |
| Filters | 3-stop neutral density | Allows a 1-2 second shutter speed to smooth the water. |
| Camera bag | Waterproof dry bag | Protects gear from salt spray and sudden rain. |
| Leave behind | Ultra-wide f/1.4 primes | The shallow depth of field is less useful for landscapes. |
| Leave behind | Heavy gimbal | A monopod is better for video on a boat. |
“The biggest mistake I see photographers make at Ha Long Bay is trying to fit everything into one wide shot. The bay is a maze of islands. Use a telephoto lens to isolate a single karst and let the mist do the rest.” — Linh Nguyen, Vietnamese travel photographer
Composition Secrets for Layered Karsts
The karsts of Ha Long Bay are not random. They form natural layers. Your job is to arrange those layers in the frame.
Start with a foreground element. It could be the bow of your boat, a floating fishing net, or a jagged rock at the edge of the water. This gives the eye a place to enter the scene.
Build the middle ground with the main cluster of karsts. Look for overlapping shapes. Avoid placing one karst directly behind another. A slight gap between them creates separation and depth.
Finish with the background. The distant karsts should fade into the mist. If the sky is clear, wait for a cloud to pass behind them. That softens the horizon and adds atmosphere.
Use the rule of thirds. Place the horizon on the lower third line if the sky is dramatic. Place it on the upper third line if the water reflections are strong. Never center the horizon unless you are aiming for a perfectly symmetrical reflection.
Common Mistakes and How to Fix Them
Even experienced photographers stumble in this environment. Here are the most frequent errors and their solutions.
-
Mist overexposure. The camera sees the bright mist and underexposes the karsts. Fix it by using exposure compensation at +0.7 or +1.0 EV. Review the histogram. Keep the highlights from clipping.
-
Flat colors. Mist scatters light, which desaturates the scene. Fix it by adding contrast in post-processing or using a polarizer in the field. Do not oversaturate the greens. It looks artificial.
-
Shaky images. A boat moves even when anchored. Fix it by using a remote shutter release or the two-second self-timer. This eliminates the vibration from pressing the shutter button.
-
Empty sky. A blank white sky kills the mood. Fix it by waiting for clouds or shooting during the golden hour when the sky has warm gradients. If the sky is empty, crop it out and focus on the water and karsts.
Planning Your Golden Hour Shots
Golden hour at Ha Long Bay is not like golden hour in the desert. The sun rises behind the eastern karsts, which means the light hits the bay at an angle. The mist acts as a natural diffuser. The result is a soft, warm glow that lasts about 20 minutes.
For sunrise shots, position your boat so the sun is behind a karst, not directly in the frame. The silhouette of the limestone against the bright sky creates a strong graphic element. The light spills around the edges, creating a rim light effect.
For sunset, the situation reverses. The sun sets behind the mainland to the west. The light reflects off the water and illuminates the karsts from the front. This is the best time for warm, saturated colors. Use a warm white balance setting to enhance the orange and gold tones.
If you want to learn more about timing your shoots across different regions, check out our guide on planning your golden hour shots across Southeast Asia by season.
How to Handle Haze and Mist
Haze is a constant companion in Ha Long Bay. It can be your best friend or your worst enemy. The trick is knowing when to lean into it.
Thin mist creates depth. The distant karsts fade to a pale blue-gray, which gives the image a sense of scale. Use a telephoto lens to compress the layers. The haze will separate the foreground, middle ground, and background naturally.
Thick fog can ruin a shot. If the visibility drops below 200 feet, the karsts disappear entirely. In that case, switch to close-up details. Photograph the texture of the limestone, the moss on the rocks, or the patterns in the water. A macro lens or a 50mm prime works well for this.
To cut through moderate haze, use a circular polarizer. Rotate it until the sky darkens and the karsts gain contrast. Do not overdo it. A little haze adds atmosphere. Too much polarizer makes the sky look unnatural.
For a deeper look at filters that help in these conditions, read our article on the 4 best filters for cutting through haze in Southeast Asian landscapes.
The Misty Morning Routine
A typical morning on the bay follows a predictable pattern. The fog is thickest just before sunrise. As the sun climbs, the fog begins to burn off. The golden light peaks about 15 minutes after the sun clears the horizon. Then the mist lifts, and the scene becomes clear and bright.
Here is a checklist for that window.
- Arrive at your shooting location 30 minutes before sunrise.
- Set up your tripod and compose the shot.
- Shoot a test frame at ISO 400 to check focus.
- Switch to ISO 100 for the final shots.
- Fire a burst of three bracketed frames every two minutes.
- Watch the light change. When the mist turns from gray to gold, increase your shutter speed to freeze the movement of a passing boat.
- Pack up when the sun is fully above the horizon and the mist is gone.
If you want to see a full breakdown of sunrise shooting at this location, visit our dedicated guide on shooting Ha Long Bay at sunrise for travel and landscape photography.
Editing Your Ha Long Bay Photos
Post-processing is where you bring out the drama you felt on the water. Start with the basics.
Adjust the white balance. The mist can make the image look cool. Warm it up slightly. Aim for a color temperature around 5500K to 6000K.
Increase contrast. Use the tone curve to add an S-shape. This deepens the shadows on the karsts and brightens the mist. Be careful not to crush the blacks. The limestone should retain some texture.
Use the dehaze slider. In Lightroom or your preferred software, set dehaze to +10 or +15. This cuts through the atmospheric scatter without making the image look harsh.
Saturate the greens and blues selectively. Increase the green luminance to make the moss and vegetation pop. Decrease the blue luminance slightly to keep the water from looking electric.
Crop for impact. If the sky is boring, crop to a panoramic 16:9 ratio. If the reflection is strong, crop to a square 1:1 ratio. The goal is to remove empty space and focus on the karsts.
For a full walkthrough of editing workflows, see our guide on mastering Asian landscape photography edits for stunning results.
Beyond the Main Bay
Ha Long Bay is vast. Most tourists stick to the central area around Titov Island and Sung Sot Cave. For unique photos, venture into the quieter channels.
Bai Tu Long Bay, to the northeast, has fewer boats and more untouched karsts. The water is clearer, and the mist sits lower. You can rent a private junk boat for a day. The cost is higher, but the solitude is worth it.
Lan Ha Bay, to the south, connects to Ha Long Bay via a narrow channel. It features floating fishing villages and white sand beaches. The karsts are smaller and more scattered, which works well for wide-angle shots.
If you are interested in other karst landscapes in the region, check out our article on how to capture the otherworldly beauty of Thailand’s limestone karst islands in 2026.
Your Next Step
You now have a clear set of Ha Long Bay photography tips to guide your next trip. The key is preparation. Check the weather forecast. Book a boat that allows early morning access. Pack your tripod and polarizer. Wake up before dawn. And when the mist turns golden, press the shutter with confidence.
The bay has been shaped by time and tide for millions of years. Your job is to capture one perfect moment in that long history. Go do it.