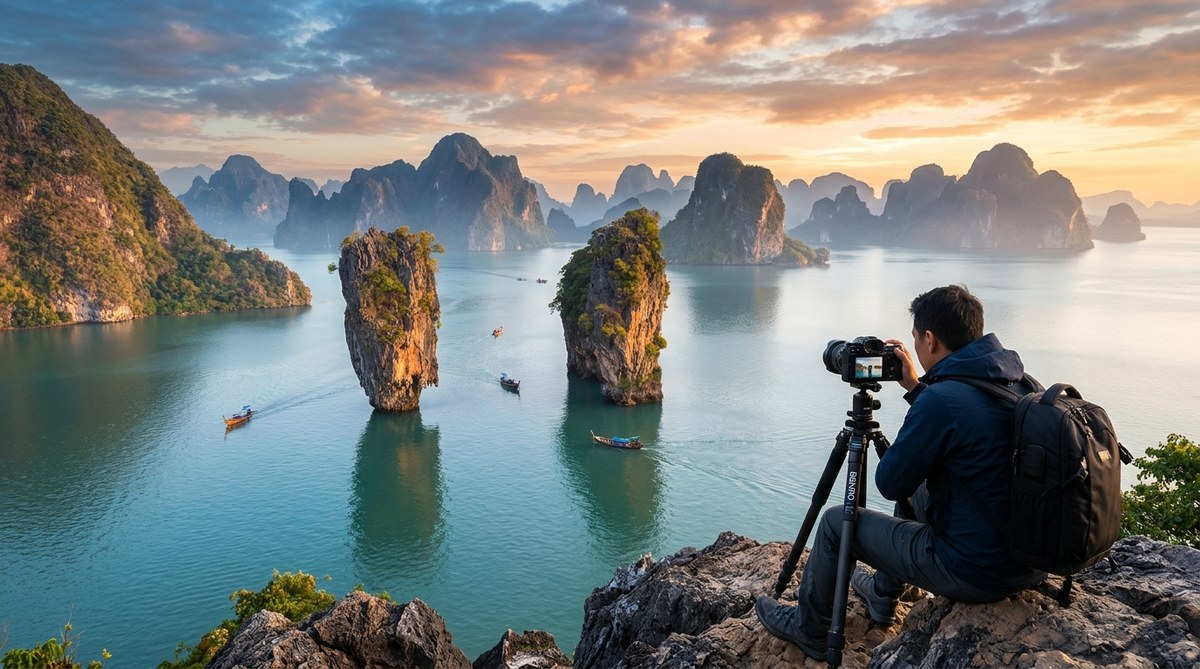
Phang Nga Bay in Thailand looks like a landscape from another planet. Towering limestone karsts rise straight out of emerald water, their jagged peaks wrapped in mist. The light shifts constantly, from soft morning pastels to harsh midday glare to fiery sunset tones. For a travel photographer, this place is a dream. But getting the shot right takes planning. You need to know where to stand, when to press the shutter, and how to handle the unique challenges of shooting over water in a tropical climate. Here is everything you need to know to photograph Phang Nga Bay in 2026.
The best images of Phang Nga Bay come from shooting during golden hour, using a polarizing filter to cut glare, and framing the karsts with foreground elements like longtail boats or mangroves. Avoid midday light. Focus on composition and patience. A 70-200mm lens is often more useful than a wide-angle for isolating the most dramatic formations.
Why Phang Nga Bay Poses a Unique Challenge
This is not a typical beach landscape. The karsts are tall, steep, and clustered together. They create strong vertical lines that can look chaotic if you do not frame them carefully. The water is often choppy, and the humidity can fog your lens in seconds. On top of that, tourist boats crowd the main channels during peak hours.
Your goal is to make the scene look as timeless and otherworldly as it feels in person. That means controlling the light, managing the crowds, and choosing compositions that simplify the chaos.
The Best Time of Year to Shoot
Thailand has three main seasons, and each affects your photography differently.
- Cool season (November to February): This is the most popular time. Skies are clear, humidity is lower, and the air has a slight haze that adds depth. Expect more tourists, but the light is reliable.
- Hot season (March to May): Temperatures climb, and the air gets hazy. Morning shoots are essential. By 10 a.m., the light becomes harsh and flat.
- Monsoon season (June to October): Afternoon storms are common, but the mornings can be spectacular. You get dramatic cloud formations and fewer boats. Just keep your gear dry.
For the best balance of good light and manageable crowds, plan your trip for late November or early December.
Scouting the Best Locations
You cannot just show up at the bay and start shooting. You need to know which spots work best for different conditions.
- Khao Khad Views Tower: This is a short hike up a hill on the mainland. It gives you a high angle looking down over the bay. Perfect for wide shots that show the scale of the karst field. Shoot here at sunrise when the light hits the eastern faces of the rocks.
- Samet Nangshe Viewpoint: A famous spot on the mainland side. You get a sweeping view of the bay with the karsts stacked in layers. Use a telephoto lens to compress the layers and create a sense of depth.
- Panorama Trail on Koh Yao Noi: This island has a trail that winds through the jungle and opens up to several viewpoints. You can shoot the karsts from different angles without dealing with boat traffic.
- Koh Talu Mangroves: For a completely different look, kayak into the mangrove channels. The roots frame the karsts in the background. Shoot here in late afternoon when the light filters through the trees.
Gear Recommendations for 2026
Your gear choices will make or break your trip. Here is what I recommend based on multiple trips to the region.
- Camera body: A weather-sealed body is a must. The humidity and salt spray will kill a non-sealed camera. Something like a Sony A7R V or Nikon Z8 handles the conditions well.
- Lenses: A 24-70mm f/2.8 is your workhorse for wide shots. A 70-200mm f/2.8 or f/4 is invaluable for compressing the layers of karsts. I also bring a 16-35mm for extreme wide shots from the kayak.
- Filters: A circular polarizer is non-negotiable. It cuts the glare off the water and saturates the greens of the vegetation. A 3-stop or 6-stop neutral density filter helps for long exposures during midday.
- Tripod: A carbon fiber tripod is light enough to carry on hikes and stable enough for long exposures. The Gitzo Traveler series is a solid choice.
- Rain cover: Even in the dry season, you will get splashed. A simple rain cover or a plastic bag with a hole for the lens is enough.
Camera Settings for Different Conditions
The light in Phang Nga Bay changes fast. Here is a table to help you dial in your settings.
| Condition | Aperture | Shutter Speed | ISO | Filter |
|---|---|---|---|---|
| Sunrise golden hour | f/8 to f/11 | 1/30 to 1/125 | 100 to 200 | Polarizer |
| Midday harsh light | f/11 to f/16 | 1/250 to 1/500 | 100 to 200 | Polarizer + ND |
| Overcast or misty | f/5.6 to f/8 | 1/60 to 1/250 | 400 to 800 | None |
| Long exposure (smooth water) | f/11 to f/13 | 2 to 30 seconds | 100 | 6-stop ND |
| Sunset golden hour | f/8 to f/11 | 1/15 to 1/60 | 100 to 200 | Polarizer |
A few notes on these settings. For sunrise, you want enough depth of field to keep the foreground and background sharp. f/8 works well. For long exposures, use a remote shutter release or the camera’s self-timer to avoid vibration. For overcast days, you can bump the ISO slightly because the light is softer and more forgiving.
Composition Techniques That Work
The karsts are tall and dramatic. Your composition needs to give them room to breathe.
- Use leading lines: The shoreline, a row of mangroves, or the wake of a boat can lead the eye toward the main karst. Place these lines in the lower third of the frame.
- Layer your foreground, midground, and background: A classic landscape trick. Put a boat or a rock in the foreground, a cluster of karsts in the midground, and the distant peaks in the background. This creates depth.
- Shoot vertical for the tallest karsts: A vertical orientation emphasizes the height of the formations. Use a 70-200mm lens to isolate a single karst against the sky.
- Wait for a boat: A longtail boat passing through the frame adds scale and a human element. It also gives the viewer a sense of how massive the karsts really are.
A Step-by-Step Workflow for a Morning Shoot
Here is a practical sequence you can follow on your first morning at the bay.
- Arrive at your chosen viewpoint 45 minutes before sunrise. This gives you time to set up your tripod, compose your shot, and adjust your settings before the light changes.
- Mount your polarizer and set your aperture to f/8. Check your histogram. Adjust exposure compensation if needed. You want the highlights to be just below clipping.
- Take a test shot at your base settings. Review it on the LCD. Check for sharpness in the foreground and background. If the image is too dark, increase your shutter speed or open the aperture slightly.
- Wait for the golden light. As the sun rises, the light will warm up. Shoot a series of frames as the color changes. Do not stop after one shot. The light shifts every few minutes.
- Switch to your telephoto lens. Once the sun is fully up, the wide shot becomes less interesting. Zoom in on a specific karst or a boat passing by. Look for patterns in the rock, like the horizontal striations in the limestone.
- Pack up by 9 a.m. The light will be too harsh after that. Use the rest of the morning to scout new locations for the next day.
Common Mistakes and How to Avoid Them
Even experienced photographers make errors in this environment. Here are the most common ones.
| Mistake | Why It Happens | How to Fix It |
|---|---|---|
| Blown-out highlights in the sky | The dynamic range is too wide for the sensor. | Use a graduated neutral density filter or bracket your exposures. |
| Soft focus from humidity | Moisture on the lens creates a hazy look. | Use a lens hood and wipe the front element with a microfiber cloth between shots. |
| Crooked horizon | The karsts are so tall that you lose track of the horizon. | Enable the electronic level in your camera or use a hotshoe bubble level. |
| Flat colors | The tropical haze washes out the greens and blues. | Use a polarizer. In post, increase the saturation of the teal and green channels slightly. |
| Too much empty sky | You framed too wide and included too much bland sky. | Crop in post or recompose to include more of the water and karsts. |
Expert advice: “The biggest mistake I see is photographers trying to fit too many karsts into one frame. It creates a cluttered image. Instead, pick one or two strong formations and build your composition around them. Less is always more in Phang Nga Bay.” — David N., travel photographer based in Chiang Mai.
Post-Processing Tips for the Final Image
Your raw files will need some work to bring out the best in the scene. Here is a simple workflow.
- Adjust the white balance. The tropical light can be warm. Set your white balance to around 5500K for a neutral look, or push it to 6500K for a warmer sunrise feel.
- Recover the highlights. Use the highlight slider in Lightroom or your preferred editor. Pull it down until the sky detail returns.
- Boost the clarity and texture. This adds definition to the limestone. Be careful not to overdo it. A clarity value of +15 to +25 is usually enough.
- Add a subtle gradient to the sky. Darken the top of the sky slightly to draw the eye down to the karsts.
- Remove dust spots and sensor marks. The humidity can attract dust to your sensor. Use the spot removal tool to clean up the image.
For a more detailed look at editing, check out our guide on mastering Asian landscape photography edits for stunning results.
Your 2026 Phang Nga Bay Photo Trip Plan
To make this all come together, here is a simple three-day plan.
- Day one: Arrive and scout. Visit Khao Khad Views Tower for sunset. Shoot wide and telephoto. Note the position of the sun.
- Day two: Shoot sunrise at Samet Nangshe Viewpoint. Spend the afternoon kayaking around Koh Talu. Shoot the mangroves in late afternoon light.
- Day three: Shoot sunrise from a longtail boat. Ask the driver to take you to the less crowded channels. Spend the afternoon editing and backing up your files.
Putting It All Together for Stunning Results
Phang Nga Bay rewards patience and preparation. The light is fleeting, the conditions are challenging, and the crowds can test your nerves. But when you get that one frame with the golden light hitting the karst, the water smooth from a long exposure, and a longtail boat passing through the foreground, you will know it was worth it.
Pack your gear, check the weather forecast, and book your trip. The bay is waiting. Just remember to keep your lens clean, your composition simple, and your shutter finger ready.