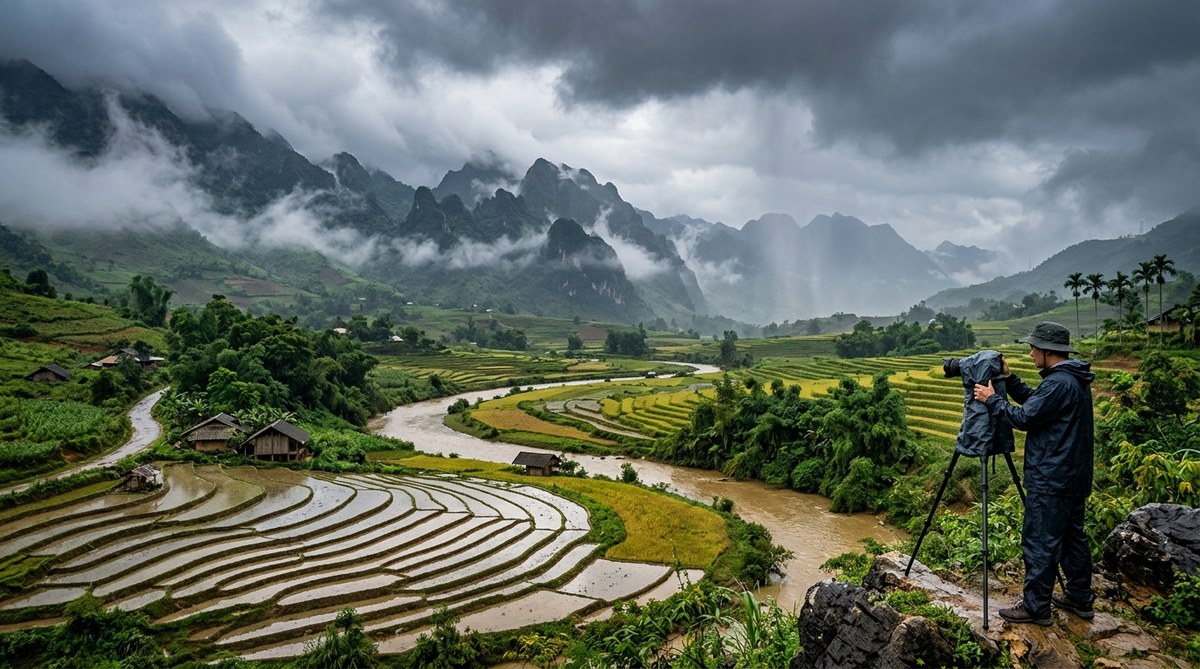
The first time rain hits a dry Asian landscape, the change is electric. Dust settles. Colors saturate. The air turns thick with possibility. For a travel photographer, this is not a setback. It is an invitation. Monsoon season transforms rice terraces into mirrors, waterfalls into thunder, and forests into green cathedrals. Most tourists pack up when the clouds roll in. That is your cue to step out.
Monsoon light is some of the most dramatic you will ever shoot. To get it right, protect your gear from moisture, use a polarizer to cut glare, shoot at f/8 for depth, and embrace low shutter speeds for motion blur. Focus on foreground elements like wet leaves or puddles to anchor your frame. Plan your day around the breaks between storms for the best soft light.
Why Monsoon Season Creates Your Best Photos
Flat, blue skies are boring. You know this. The magic happens when the atmosphere gets messy. During monsoon season in Asia, clouds act like a giant softbox. They diffuse the sun and create even, soft light that lasts all day. You do not have to chase golden hour. The golden hour comes to you, filtered through layers of mist and rain.
Thunderstorms also add texture. Dark grey skies contrast against bright green rice paddies. Rain streaks create lines in your frame. Puddles turn into mirrors for reflections. The drama is built in. All you have to do is show up with dry gear and a plan.
The Gear You Actually Need for Wet Weather
You do not need a new camera. You need a system for keeping your current one dry. Here is the short list of essentials for monsoon landscape photography tips that actually work.
- A weather-sealed camera body (most mirrorless cameras from 2020 onward are fine)
- A rain sleeve or a cheap shower cap for your lens
- A microfiber cloth in a ziplock bag
- A polarizing filter (this is non-negotiable)
- A sturdy tripod with rubber feet
Skip the fancy rain covers if you are on a budget. A plastic bag and a rubber band will do the same job. The key is to keep water off the lens glass and out of the ports. When you are not shooting, keep the camera inside your bag with silica gel packets.
For a deeper look at building a kit for the region, check out our guide on choosing the perfect camera gear for capturing Asia’s stunning landscapes.
Camera Settings for Low Light and Motion
Monsoon weather means less light. That is not a problem if you adjust your settings. Here is a simple workflow to follow when the sky opens up.
- Set your aperture to f/8 or f/11 for maximum sharpness across the frame.
- Switch to aperture priority mode so the camera handles shutter speed.
- Keep your ISO between 100 and 400. Use a tripod for stability.
- If you want rain streaks, drop your shutter speed to 1/30 or slower.
- Use a polarizer to remove reflections from wet surfaces and deepen greens.
One common mistake is raising the ISO too high. You lose shadow detail and introduce noise. Instead, let the shutter speed drop. A tripod gives you freedom to shoot at 1/4 of a second or slower without blur.
Composition Tricks for Storm Light
Monsoon landscapes demand strong composition. The sky is heavy, so you need a solid foreground to balance it. Look for these elements when you frame your shot.
- Wet rocks or gravel that reflect the sky
- A single tree or structure against a dark cloud bank
- Leading lines formed by flooded rice terrace edges
- A person with an umbrella for scale
Use the rule of thirds, but break it when the sky is spectacular. Give two thirds of the frame to the clouds and one third to the land. This works especially well when shooting over Ha Long Bay at sunrise during the rainy season.
Common Mistakes and How to Avoid Them
Even experienced photographers slip up in monsoon conditions. Here is a table that shows the most common errors and the simple fix.
| Mistake | Why It Happens | The Fix |
|---|---|---|
| Flat, grey images | Overcast light removes contrast | Use a polarizer and boost contrast in post |
| Water spots on images | Raindrops on the lens | Wipe the lens before every shot |
| Blurry long exposures | Wind shakes the tripod | Hang your bag from the center hook for stability |
| Fogged up lens | Humidity inside the camera | Let gear acclimate slowly in a sealed bag |
| Missed focus | Low light confuses autofocus | Switch to manual focus and use live view zoom |
“The best monsoon shots I ever got were from a flooded paddy in Bali. I was soaked. My camera was dry. I shot at f/11 with a two second exposure. The rain turned into silk and the clouds looked like velvet.”
* Anon, professional travel photographer
Timing Your Shots Around the Weather
Monsoon rain does not fall all day. It comes in waves. Learn to read the local pattern. In most parts of Southeast Asia, heavy rain hits in the late afternoon. Morning hours are often clear with building clouds by noon.
Plan your shoots around these windows. Wake up early for the misty morning light. Take a break during the heaviest downpour. Be ready to shoot again when the rain stops and the sun breaks through. That post storm light is some of the best you will ever see.
For more on planning your day around light conditions, read our article on planning your golden hour shots across Southeast Asia by season.
How to Protect Your Photos in Humid Conditions
Humidity is the real enemy. It creeps into your camera bag and stays there. After a day of shooting, follow these steps.
- Remove the battery and memory card.
- Open all compartments and let the camera air dry in a room with a dehumidifier.
- Wipe down the lens barrel with a dry cloth.
- Store everything with fresh silica gel packs.
Do not leave your gear in a hot car. The temperature change will cause condensation inside the lens. Let it cool down slowly in your hotel room before you open the bag.
The Best Locations for Monsoon Photography in Asia
Some places were made for storm light. If you are planning a trip, consider these destinations for their dramatic monsoon landscapes.
- Sapa, Vietnam during the wet season (May to September)
- Munnar, India in the southwest monsoon (June to August)
- Luang Prabang, Laos when the Mekong rises (July to October)
- Bali, Indonesia for volcanic mist and black sand beaches (October to March)
Each of these locations offers a unique combination of green landscapes, dramatic clouds, and cultural elements. If you want to shoot waterfalls at their peak flow, aim for the middle of the monsoon season. For misty rice terraces, go right after a storm passes.
For a more focused guide, see our tips on capturing the mystical landscapes of Vietnam’s Ha Giang Loop in 2026.
Editing Monsoon Photos for Maximum Impact
Post processing is where monsoon images come to life. The raw files will look flat. That is normal. Use these edits to bring out the drama.
- Increase contrast by 15 to 20 points.
- Lower the highlights to keep cloud detail.
- Raise the shadows to reveal texture in dark areas.
- Boost the green saturation slightly, but pull back the luminance to avoid noise.
- Add a subtle vignette to draw the eye to the center.
Avoid over sharpening. The softness of rain and mist is part of the appeal. Keep it natural. For a complete editing workflow, check out our guide on mastering Asian landscape photography edits for stunning results.
Stay Safe While Shooting in Storms
Your safety matters more than any photo. Monsoon storms bring lightning, flash floods, and slippery trails. Follow these rules.
- Never set up on a ridge during a thunderstorm.
- Watch for rising water levels near rivers and streams.
- Wear shoes with good grip.
- Keep a backup battery in a waterproof pouch.
- Tell someone where you are going.
If you hear thunder, count the seconds between the flash and the sound. If it is less than 30 seconds, you are too close. Pack up and move to lower ground.
Putting It All Together
Monsoon season is not a limitation. It is a creative advantage. The conditions that drive other photographers indoors are exactly what you need to make images that stand out. Wet landscapes reflect light. Clouds add depth. Rain creates texture.
Start with your gear protection. Then focus on composition. Use the storm breaks to your advantage. Edit with restraint. Above all, get out there and shoot. The perfect monsoon shot is waiting for you. You just have to be willing to get a little wet.
For more on working with dramatic weather, take a look at our article on mastering monsoon moods how to capture dramatic storm light over Asian landscapes in 2026. It covers advanced techniques for reading storm patterns and positioning yourself for the best light.
Now grab your rain sleeve, pack your tripod, and go make some images that matter.